Home Assistant: Everything You Need to Know

One thing I would say for sure is that Home Assistant never disappoints. Home Assistant is a bridge or rather an open-source automation system. I love love LOVE Home Assistant because you can add any smart device to Apple HomeKit with Home Assistant! And the best part? It has multiple protocol compatibility! Alright, let me elaborate and explain to you “What is Home Assistant?”
What is Home Assistant?
So, to give you are brief explanation, Home Assistant is an open-source home automation system that allows you to take control of all your smart home devices and create amazing automation. This would allow you to have a HomeKit Home Assistant integration or even an Alexa Home Assistant integration.
Essentially, it is a central hub that connects any smart device to Apple HomeKit. It is one of the best automation Systems in 2024. It is a GAME CHANGER! Regardless, of whether you are setting up a Home Assistant Docker or using Home Assistant Yellow, Home Assistant allows you to integrate any devices with ease.
How to Add Any Device to Apple HomeKit
Do you want me to sum it up in just one word? AMAZING Allow me to share my favorite feature with you before I go over how it operates. It is quite simple and takes very little time or coding expertise. Any Smart Home devices can be connected to Apple HomeKit with AddtoHomeKit, a software solution. For example; if you want to combine Shelly devices with Apple HomeKit, you do not need to download those large programs.
What Can I Do with a Home Assistant?
As I mentioned before the Home Assistant allows you to integrate any device together, very similar to the ATH Bridge or the Athom Homey Pro. With a Home Assistant you can integrate any design whether it be a Home Assistant Docker it does not matter as it allows you to have a wide range of integrations such as a Shelly Home Assistant/ SimpliSafe Home Assistant integration or even a Tuya Home Assistant integration.
You can even integrate Shelly and SimpliSafe smart devices or even Tuya and Govee smart devices together with Home Assistant!
One of the amazing features of Home Assistant is that it has a wide range of integrations, making your home smarter and bringing incomparable efficiency.
Key Features of Home Assistant
With Home Assistant integrations, you can connect just about any device as it has a wide range of compatible devices and supports a wide range of protocols. Whether it is Zigbee2MQTT, Alexa or even if it is your Apple TV, you can integrate them
For instance, using SkyConnect and Zigbee2MQTT, you can effortlessly integrate ZigBee devices. While Home Assistant HACS offers thousands of community-driven add-ons to further enhance your setup, which just helps you have a smarter smart home!
Best Methods to Run Home Assistant
Raspberyy Pi
I would personally highly recommend running Home Assistant on a Raspberry Pi, it is very popular not just for HomeBridge users but even for HOOBS users. For newer Home Assistant Raspberry Pi users, or beginners, Raspberry Pi is going to be a great choice as it is very beginner-friendly. It provides a low-costly and very flexible solution.
Home Assistant Server or Home Assistant Green/Home Assistant Yellow
If you are looking at a more complex set up or planning on having a larger set up, a Home Assistant server or Home Assistant Green is the best option for you. They both offer an amazing performance for a larger setup.
Tip: For a tidier setup, a Docker installation is an amazing choice as it allows you to run Home Assistant in a containerized environment, which makes it significantly easier for updates and backups.
Setting Up Home Assistant
Getting started with Home Assistant installation is pretty straightforward. I would suggest you visit Home Assistant Reddit for tips, tricks and community support as it was a great help for me.
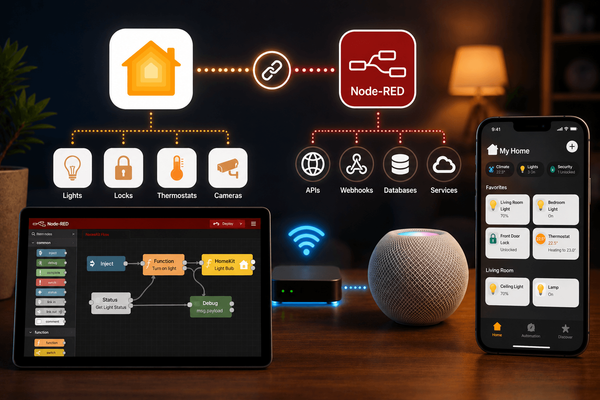
If you are interested in more advanced configurations, the Home Assistant API offers powerful tools to customize your setup even further!
Step-by-Step Guide to Set Up Home Assistant
- Choose your preferred hardware (one of the below)
- Raspberry Pi: Ensure you have a Raspberry Pi 4, a microSD card (32GB+) and, of course, a power supply.
- Home Assistant Yellow / Home Assistant Green
- Home Assistant Server / Home Assistant Docker
- Install Home Assistant
- Download the Home Assistant OS image.
- Flash the image onto the microSD card using Balena Etcher.
- Insert the card into the Raspberry Pi, power it up, and wait for the setup to complete.
- Install Docker on your system.
- Access Home Assistant
- Initial Configuration
- Create an account.
- Set Location and Time.
- Integrate Devices: Start adding devices such as Shelly, SimpliSafe, Govee, Tuya, or use Home Assistant integrations like Zigbee2MQTT.
- Customize with Automations
- Use Home Assistant HACS for additional customizations and install themes or integrations.
- Create Home Assistant Automations under Settings > Automations and Scenes to manage devices such as Alexa, Apple TV, or even Google Home.
1. Raspberry Pi Installation
2. Docker Installation
Run the following command:
docker run -d --name homeassistant --privileged --restart=unless-stopped -e TZ=YOUR_TIMEZONE -v /path/to/your/config:/config --network=host ghcr.io/home-assistant/home-assistant:stable}Access Home Assistant by navigating to http://[YOUR_PI_IP]:8123 in your web browser.
Step-By-Step on Home Assistant + HomeKit
- Download Home Assistant
- Install Home Assistant
- Set Up Home Assistant
- Access the Intrgrations Page
- Add HomeKit Integration
- Configure the Bridge
- Finish Configuration
- Open the Home App
- Add Accessory
- Use the HomeKit Code
- Complete Pairing
You can run Home Assistant on a Raspberry Pi, a server, or in a Docker container. Vist the Home Assistant's website to download the appropriate installation image or instructions for your setup.
Follow the installation instructions specific to your hardware. For a Raspberry Pi, this is typically involves flashing an image to an SD card and booting the Raspberry from it.
Once Home Assistant is running, open a web browser and navigate to
http://homeassistant.local:8123In Home Assistant, go to Settings > Devices & Services.
Click on "Add Integration" and search for 'HomeKit'. Select the "HomeKit Bridge" option.
Include Domians or Entities: You will be prompted to select specific domains (eg: lights, switches) or individual entities you want to expose to HomeKit. Choose the devices you want to control via HomeKit.
Set Up the Bridge: After selecting your devices, follow the prompts to configure your HomeKit bridge. Home Assistant will generate a HomeKit code for pairing.
Save your settings. Home Assistant will start running the HomeKit bridge.
On your iPhone or iPad, open the Home app.
Tap on the "+" icon in the top right corner and select "Add Accessory".
Scan the HomeKit pairing code provided by Home Assistant using your iPhone camera. If you're prompted that no accessories were found, tap on "I Don't Have a Code or Cannot Scan" and select "Home Assistant Bridge" from the list.
Follow the on-screen instructions to complete the pairing process. The devices you selected in Home Assistant should now appear in the Home app.
Comparison between Home Assistant and Other Automation Platforms
| Feature | Home Assistant | Apple HomeKit | Google Home | Amazon Alexa |
|---|---|---|---|---|
| Open Source | Yes | No | No | No |
| Local Control | Yes | Yes | Limited | Limited |
| Brand Compatibility | Multi-brand compatibility & supports many protocols | Apple ecosystem & HomeKit supported | Google Nest & partners | Amazon Echo & partners |
| Customization | Integrates with Google Assistant, Alexa & Siri | Low | Low | Low |
| Voice Assistant | Integrates with Google Assistant, Alexa & Siri | Siri | Google Assistant | Alexa |
| Privacy | Strong (local control, no cloud needed) | Strong (local control) | Moderate (local control) | Moderate (local control) |
| Ease of Use | Moderate (technical setup required) | High | High | High |
| Extensibility | Very High (custom components, add-ons [SkyConnect]) | Low | Low | Low |
Read also,
- Starling Home Hub: Connecting Nest and HomeKit
- Apple HomeKit – Everything you need to control your smart home
Conclusion
Home Assistant is very inclusive so regardless of whether you are an experienced smart home user or a beginner, Home Assistant offers a flexible and a very powerful platform to bring your smart devices together to integrate and connect all your smart devices together for a unified smart home experience. Whether it be a Shelly and Alexa integration, it is all possible with Home Assistant!
FAQs
The Home Assistant allows you to connect your smart home devices such as your Tuya lights, Ring cameras, or any smart devices. Which ultimately allows you to have a great automation with the user-friendly and unified web-based user interface of Home Assistant.
Yes, it requires a computer or some hardware that can run it 24/7. It does not require a lot of CPU power, but you will need a CPU 2 Gen or newer. You can even use a Raspberry Pi 3,4 or 5.
- Raspberry Pi 3, 4 or 5 with power supply
- MicroSD card
- Ethernet connection
No, Home Assistant does not require a subscription and is free to use if you want the basic functionality. However, if you want cloud services and remote access through Nabu Casa then you need to have a Nabu Casa subscription.
You don’t necessarily need internet access after Home Assistant is installed but it does require a local network as Home Assistant does not work without a local network that connects everything together.
To control your smart home devices directly through Home Assistant and create maybe a Tuya Home Assistant or a Shelly Home Assistant of sorts you need either Bluetooth, ZigBee or a z-wave adapter to plug into the install hosting device.
The home assistant's actual brains operate as a server and require a platform that is constantly powered on via your network; when it's operating, it doesn't even require a display connected to it.
A pi, an old PC, or a mini PC are used by some. After that, the server opens the dashboards to various PCs, phones, and tablets through webpages or apps. Android and Fire tablets can serve as your constant dashboards.