Homebridge - Add any device to HomeKit


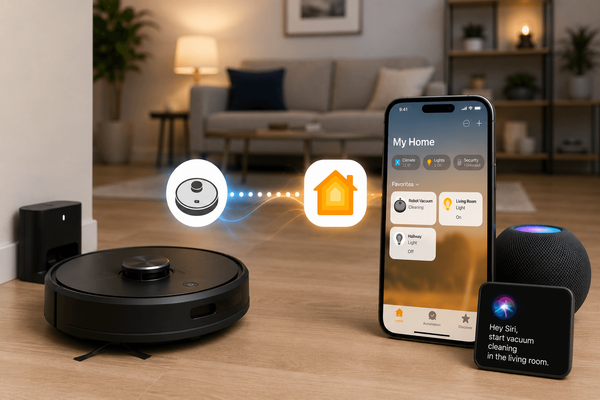
HomeKit is a compact home automation solution with a combination of the Apple ecosystem and decent third-party software apps. The role of Homebridge is most important when it comes to HomeKit. Hence, it gives a way to connect those devices that may never add official support.
Quick Answer
Homebridge is a free, open-source Node.js server that bridges non-HomeKit smart home devices into Apple's HomeKit ecosystem. It emulates the HomeKit Accessory Protocol (HAP), allowing devices like Nest thermostats, Ring cameras, and TP-Link plugs to appear natively in the Apple Home app, respond to Siri, and participate in HomeKit automations without any additional hardware purchase.
What is Homebridge?
Homebridge is a free, open-source program that runs on a small computer in your home. It acts as a translator between Apple HomeKit and smart devices that Apple does not officially support.
Here is the problem it solves: Apple HomeKit only works with devices that Apple has approved. Thousands of popular devices like Ring doorbells, Nest thermostats, and TP-Link smart plugs are not on that approved list. Without Homebridge, you cannot control them with Siri or the Apple Home app.
Homebridge bridges that gap. It makes those unsupported devices look like official HomeKit accessories. You can then control them with your voice, automate them, and manage them from your iPhone just like any other HomeKit device
Key facts at a glance:
| Detail | Value |
|---|---|
| License | Open-source (Apache 2.0) |
| Runtime | Node.js (v18 LTS or v20 LTS recommended) |
| Plugin count | 2,000+ community plugins |
| Platforms | Raspberry Pi, macOS, Windows, Linux, Docker, NAS |
| Matter support | Yes (Homebridge 2.0+) |
| Cost | Free |
How Does Homebridge Work?
Think of Homebridge as a translator sitting between Apple HomeKit and your smart devices.
When you say, "Hey Siri, turn on the living room light," HomeKit sends that command to Homebridge. Homebridge figures out what device you mean, translates the command into language that device understands, and sends it over. The device responds, and Homebridge tells HomeKit whether it worked.
All of this happens on your home network. No extra subscription. No cloud service from Homebridge's side.
If you're looking to add Shelly devices specifically, check out our guide on Homebridge Shelly integration
Key Features
Child Bridges
If one plugin stops working, it should not crash everything else. Child Bridges prevent that. Each plugin runs in its own separate space. If the Ring plugin crashes, your Nest and TP-Link devices keep working fine.
This is the most important stability feature if you are running many devices.
Matter Support
Homebridge version 2.0 added support for Matter. Matter is a new smart home standard supported by Apple, Google, Amazon, and Samsung.
With Matter support, Homebridge can now share your devices to multiple platforms at the same time — Apple HomeKit, Google Home, Amazon Alexa, and Samsung SmartThings. You do not need a separate setup for each platform.
Web Dashboard
Homebridge has a browser-based dashboard you can open on any device connected to your home network. You access it by going to http://homebridge.local:8581 in your browser.
From the dashboard you can:
- Install and remove plugins with one click
- Change settings without editing any code files
- Watch live logs to fix problems
- Backup and restore your setup
- Control your devices directly from the browser
Plugin Library
Plugins are the add-ons that connect Homebridge to specific devices. There are three types:
| Level | How It Works | Examples |
|---|---|---|
| Level 1 | Finds your devices automatically on your network | TP-Link Kasa, Sonos |
| Level 2 | You log in with your account and it finds your devices | Ring, Nest, myQ |
| Level 3 | You enter technical details like IP address or API key | Xiaomi, custom DIY devices |
Does Homebridge Support Matter?
Yes. Homebridge 2.0 added full Matter support.
This means one Homebridge setup can now bridge your devices to Apple HomeKit, Google Home, Amazon Alexa, and Samsung SmartThings — all at the same time.
Will Matter replace Homebridge? No. Matter is a new standard, but it only covers a limited number of device types. It does not support older devices or cloud-based integrations. Homebridge still supports thousands of devices that Matter cannot. The two work alongside each other, not against each other.
See more: Integrating Apple HomeKit with Node-RED: A Complete Guide
What Hardware Do You Need?
Homebridge needs to run all the time on a device connected to your home network. It uses very little power, so you do not need a powerful computer.
| Hardware | Cost | Best For |
|---|---|---|
| Raspberry Pi 4 (2GB RAM) | ~$45 | Most home users. Best overall choice. |
| Raspberry Pi 3B+ | ~$35 | Small setups with fewer than 15 devices. |
| Mini PC (Intel N100) | ~$150 | Power users running Homebridge alongside other services. |
| Synology or QNAP NAS | Already owned | People who already have an always-on NAS device. |
| Mac, Windows, or Linux PC | Already owned | Testing Homebridge before buying dedicated hardware. |
Minimum requirements: Any device that can run Node.js 18 or newer, with at least 512MB of RAM.
Step by Step Guide to add any devices to Apple HomeKit using Homebridge
Before connecting your smart device to Apple HomeKit, you need to have a computer that works with Homebridge. Here’re the options for installing Homebridge.
- Install Homebridge on macOS
- Install Homebridge on Debian or Ubuntu Linux
- Install Homebridge on Windows 10
Install Homebridge on macOS
Before you begin – What you’ll need
- A computer that runs the latest version of OS.
-
Terminal app.
You need to have access to the terminal so you can copy and paste commands from this guide.
- You have to make sure that your computer doesn’t yet have Homebridge installed. If you installed Homebridge previously, you want to remove any existing installation.
- Apple Silicon / M1 devices.
Step 1: Install Node.js
- Install Node.js.
- Install other development environments.
- Test Node.js installation.
node -v: To check the installed Node.js version.npm -v: To check the installed npm (Node Package Manager) version.
You’ll need to install Node.js before installing Homebridge. Homebridge uses Node.js for running Javascript apps on a local machine.
Note: Additional Homebridge plugins work properly with these development environments such as C++ or Python.
Once Node.js is installed, test whether it works or not from a terminal window using the following commands:
#test node.js is working
user@local:~# node -v
v16.13.1
#test npm is working
user@local:~# npm -v
8.7.0Step 2: Install Homebridge and Homebridge UI
Run the following commands on the terminal window or over SSH to install Homebridge with the web interface components.
#install homebridge
user@local:~# sudo npm install -g --unsafe-perm homebridge homebridge-config-ui-xThis may take some time to install Homebridge as npm will fetch and install a few dependencies needed.
Step 3: Start Homebridge service
Once Homebridge is installed, you can start the Homebridge service. The first run takes a bit longer time as it generates its initial configuration.
#start homebridge service
user@local:~# sudo hb-service install –-user homebridgeThis command sets up Homebridge and the Homebridge UI as a service.
config.json will automatically create under ~/.homebridge if it does not already exist.
Step 4: Log in to the Homebridge UI
Once the installation is completed, you can access the web interface using the listed IP addresses.
Log into the web interface using the default username and password (both admin).
If Homebridge is installed and set up to run correctly, the Homebridge UI web interface will allow you to:
- Install Plugins
- Remove Plugins
- Update Plugins
- Modify the Homebridge config.json
- Manage aspect of your Homebridge service
Install Homebridge on Windows 10
Before you begin – What you’ll need
- A computer running an update-to-date version of Windows 10
- An account with administrator privilege
Step 1: Install Node.js
Install Node.js and other development environments such as C++ or Python before adding Homebridge to your device.
- Download the newest version of Node.js using:
- Node.js v16.14.0 64-bit
- Node.js v16.14.0 32-bit
- Check whether Node.js works:
#test npm is working
user@local:~# npm -v
8.7.0
Step 2: Install Homebridge and Homebridge UI
Run the following commands on the administrator Node.js command prompt to install Homebridge with the web interface components.
npm install -g --unsafe-perm homebridge homebridge-config-ui-xStep 3: Start Homebridge service
To install Homebridge as a service, use the following commands from an administrator command prompt.
hb-service installOnce Homebridge is installed as a service, ensure you give Node.js permissions.
config.json will automatically create under ~/.homebridge if it does not already exist.
Step 4: Log in to the Homebridge UI
With Homebridge UI, you can log in using the command line or using Homebridge User Interface. See how to log in to the Homebridge UI.
Using the command line:
You can view your pairing code from a Node.js command prompt using this command:
If you want to edit your config.json, open the $HOME/.homebridge/config.json file in a code editor. If you have made any changes to config.json, restart Homebridge using the following commands:
hb-service stop
hb-service start
Install Homebridge on Debian or Ubuntu Linux
Before you begin – What you’ll need
- A Debian, Ubuntu, or Raspbian Linux machine
- Terminal app – You need to have access to the terminal. So, you can copy and paste commands from this guide
- You have to make sure that doesn’t yet have Homebridge (If you installed Homebridge previously, you want to remove any existing installation)
- Install Node.js
- Install Homebridge and Homebridge UI
- Start Homebridge service
- Log in to the Homebridge UI
Now, you have to install the latest version of Node.js and additional dependencies (use following commands):
# setup repo
curl -sL https://deb.nodesource.com/setup_16.x | sudo bash -
# install Node.js
sudo apt-get install -y nodejs gcc g++ make python net-tools# test node is working
node -vNext, you need to install Homebridge with the web interface components. Open the administrator Node.js command prompt and run the following commands:
sudo npm install -g --unsafe-perm homebridge homebridge-config-ui-xNow, you can start the Homebridge service by using following command from your terminal:
sudo hb-service install --user homebridgeNext, you need to make sure you grant Node.js permissions to access your private network.
config.json will automatically create under /var/lib/homebridge if it does not already exist
Let's see how to login to the Homebridge UI
If you're more into Apple HomeKit and own Ring Devices, you may find How to add Ring Devices with Apple HomeKit.
How to Uninstall Homebridge?
- If you want to remove your Homebridge service, run the following command:
- After that, you can remove Homebridge and the Homebridge UI by running this command:
sudo hb-service uninstall
sudo npm uninstall -g homebridge homebridge-config-ui-x
Most Popular Homebridge Plugins
| Plugin | What It Connects | Needs Cloud? |
|---|---|---|
homebridge-ring |
Ring doorbells and cameras | Yes |
homebridge-nest |
Nest thermostats and cameras | Yes |
homebridge-tplink-smarthome |
TP-Link Kasa plugs and bulbs | No |
homebridge-eufy-security |
Eufy cameras and sensors | Yes |
homebridge-myq |
Chamberlain garage door openers | Yes |
homebridge-hue |
Philips Hue lights | No |
homebridge-meross |
Meross plugs and garage openers | Yes |
homebridge-tuya |
Tuya smart devices | Yes |
homebridge-unifi-protect |
UniFi security cameras | No |
How to install a plugin: Open the Homebridge dashboard, go to the Plugins tab, search for the plugin name or your device brand, and click Install.
Homebridge vs Home Assistant
Both are free, open-source smart home platforms. Both run on a Raspberry Pi. Here is how they differ:
| Homebridge | Home Assistant | |
|---|---|---|
| Main purpose | Add devices to Apple HomeKit | Control all smart home platforms |
| Ease of setup | Easier | More complex |
| Best for | Apple households | Mixed-platform households |
| Custom automations | Through Apple Home app | Built-in, very powerful |
| Number of integrations | 2,000+ plugins | 3,000+ integrations |
| Supports non-Apple platforms | Yes, via Matter (v2.0) | Yes, natively |
| Hardware needed | Raspberry Pi 3B+ or better | Raspberry Pi 4 (4GB RAM recommended) |
Simple rule: If your home runs mostly Apple devices and you want everything in the Apple Home app, use Homebridge. If you want a full smart home dashboard that works across Apple, Google, Amazon, and more, use Home Assistant.
Limitations to Know Before You Start
- 150 device limit per bridge. HomeKit only allows 150 accessories per bridge. If you need more, you can use Child Bridges or run a second Homebridge instance.
- Renaming devices. If you rename a device inside Homebridge, the name does not update in the Apple Home app. You have to rename it in the Home app separately.
- Some plugins need the cloud. Level 2 plugins connect to the device manufacturer's cloud service. If that service goes offline or changes, the plugin may stop working until someone from the community fixes it.
- Always-on requirement. Homebridge must stay running. If your host device loses power or restarts, your HomeKit accessories will show as unresponsive until Homebridge starts back up.
FAQs related to Homebridge
Homebridge supports Windows, Linux, and Raspberry Pi. It needs to be turned on all the time to work, so Raspberry Pi is often a good choice due to its low power consumption.
If you don't have a Raspberry Pi, you can download and install the newest version of Node.js and run Homebridge on various types of computers.
Yes, there are several apps available for controlling smart home devices, such as the Apple Home App and Eve for HomeKit. These apps can work with Homebridge to enhance your smart home experience.
Yes, Homebridge is free and open-source software.
No, Matter is not a replacement for Homebridge. While Matter may support some devices, Homebridge offers flexibility and compatibility with a wide range of devices and services.
Yes, HomeBridge is worth it. It extends HomeKit compatibility, allows customization of automations, integrates with other services, and can save money by connecting existing devices.
HomeBridge allows you to extend HomeKit compatibility, customize automations, integrate with other services, and save money by connecting existing devices instead of purchasing new HomeKit-compatible ones.