How to add any Nuki Smart Devices to Apple HomeKit
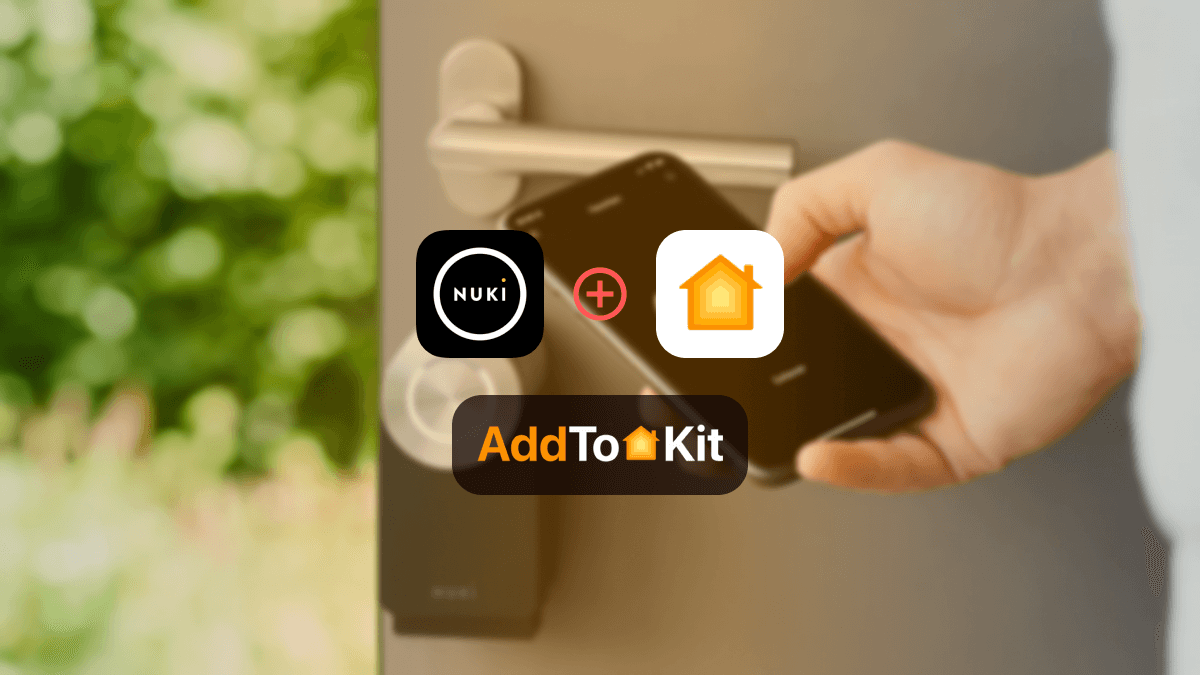

Did you know that most of the new Nuki devices are compatible with HomeKit? Thanks to Apple HomeKit, the Nuki Smart Lock can now also be controlled with Siri.
Can I Add Nuki Devices to Apple HomeKit?
Yes, Nuki smart locks can work with Apple Home but it depends on your device generation. Newer Nuki locks supports Apple Home via Matter, while older models use HomeKit over Bluetooth. If you want a simple or more flexible set, you can use solutions like AddtoHomeKit (best overall) or ATH Bridge (best plug-and-play hardware).
AddToHomeKit [Best Recommended Solution]
If you want the simplest and most reliable method, AddToHomeKit is the best overall solution.
It removes the need to manually figure out plugins, compatibility, or setup paths by guiding you step-by-step based on your exact device.
Why AddToHomeKit Is the Best Option
- No technical knowledge required
- Step-by-step guided setup
- Works across multiple ecosystems
- Reduces setup errors and confusion
The Nuki AddtoHomeKit solution is a great option for integrating Nuki devices with HomeKit. It provides an easy-to-use interface that guides you through the process of adding Nuki to the Home App. Whether you’re using the Nuki Lock, AddtoHomeKit simplifies the integration, ensuring your devices are up and running with Apple HomeKit in no time.
Compared to Homebridge or HOOBS, AddToHomeKit removes the complexity and gives a clearer, faster path to integration.
Features
- Provides user-friendly Interface
- Supports a wide range of smart home devices
- Offers step-by-step instructions and troubleshooting tips
Tip: Nuki says that the Nuki Smart Lock 3.0 is compatible with Apple HomeKit!
Step-By-Step Guide to add Nuki Devices to HomeKit using AddToHomeKit
- Go to the official AddtoHomeKit website.
- Select the Nuki ecosystem and proceed to the next page.
- Select your preferred solution.
- Choose the appropriate Operating System.
- Install the HomeBridge Plugin.
- Tap on Add to Home
- Follow the provided instructions
It supports a huge range of ecosystems. So, you can add Yale smart devices to Apple HomeKit and add Alexa smart devices to Apple HomeKit with AddtoHomeKit.
ATH Bridge [Best Plug-and-Play Solution]
ATH Bridge is a device that is specifically compiled and is a pre-flashed HomeBridge server. It is a device solution. You can use AddToHomeKit Bridge to connect Nuki to iPhone and the Home App allowing you to control Nuki away from Home. Not only Nuki devices you can add any smart home devices to HomeKit use ATH Bridge.
How to add Nuki to HomeKit with the ATH Bridge.
How Do You Use ATH Bridge for Nuki HomeKit Integration?
ATH Bridge is the best hardware solution for adding Nuki to Apple Home without dealing with software setup.
It works as a pre-configured Homebridge server, allowing you to connect devices with minimal setup.
Best for users who want a plug-and-play solution without diffictechnical setup.
Features
- Supports multiple smart home protocols, including Zigbee and Z-Wave
- Allows to create advanced automation rules and scenes
- Improves the connectivity and responsiveness of your smart home setup
Also you can integrate UniFi HomeKit, ESPHome HomeKit using ATH Bridge.
Step-By-Step Guide to add Nuki Devices to HomeKit using AddToHomeKit Bridge
- Purchase and install the ATH Bridge
- Configure the Bridge
- Integrate with HomeKit
- Create Automations
Purchase the ATH Bridge and connect it to your home network.
Follow the setup guide to configure the ATH Bridge with your home network.
Use the ATH Bridge’s integration features to connect with HomeKit and add the bridge to the home app and connect it with your Nuki devices.
Set up automation rules and scenes in the home app to control your Nuki devices.
HomeBridge Solution
HomeBridge is an open-source platform that allows non-HomeKit devices to work with HomeKit. If you love a little coding and tech challenge this is perfect for you to create a Nuki Home Kit.
Features
- Connects a wide range of devices
- Customizable Plugins
- Provides advanced configuration options
Step-By-Step Guide to add Nuki Devices to HomeKit using Homebridge
- Install HomeBridge on Mac / PC
- Edit the configuration file
- Run the Nuki Plugin
- Control devices on HomeKit
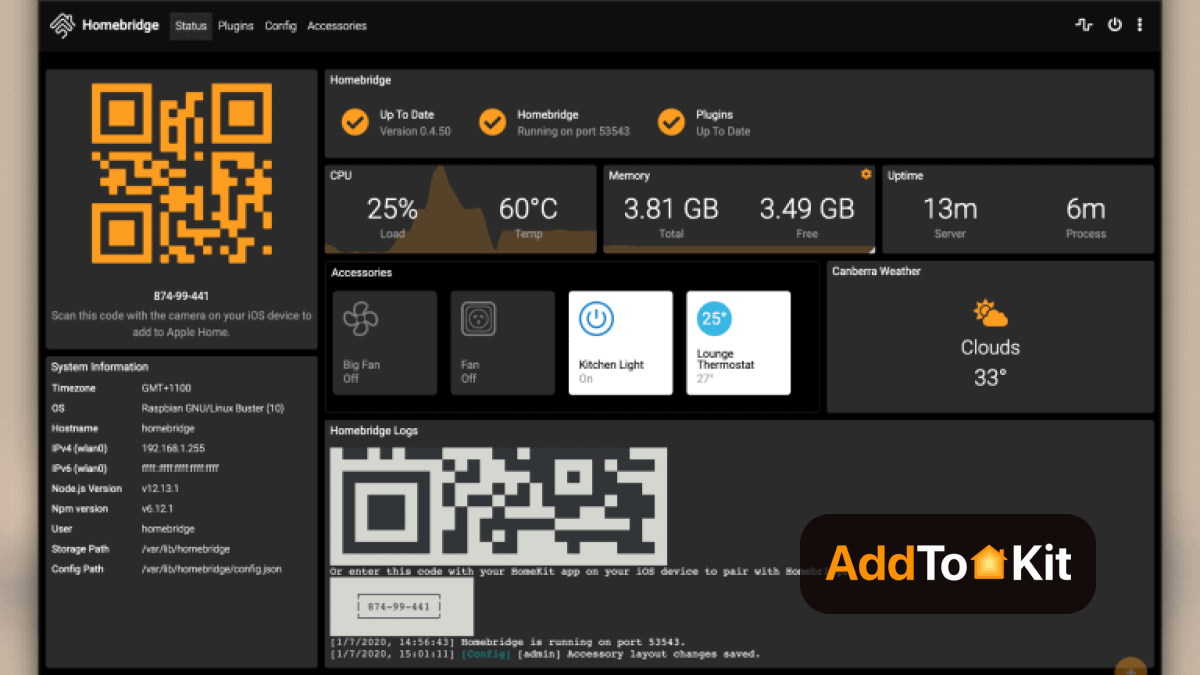
If you haven’t installed Homebridge previously, you need to install home bridge on your Mac / PC before installing the Nuki HomeBridge plugin.
To use add Nuki plugin to your HomeBridge config.json using the below command:
{
    "name": "Nuki",
    "username": "your-nuki-email",
    "password": "your-nuki-password",
    "platform": "Nuki"
}
For that you want to go to the Home App on your Apple device and scan the QR code of your Homebridge UI. Then, you can control your Nuki devices with HomeKit.
So, I did run into a few technical issues but this step-by-step guide should work for you, but if you do run into the same issues follow these tips:
Troubleshooting Tips: Nuki Not Discoverable by HomeBridge
- Ensure HomeBridge is Running: Open the HomeBridge UI and check if the Nuki plugin is loaded properly. Restart HomeBridge if necessary.
- Verify Plugin Installation: Ensure you have installed the correct Nuki pluin (
homebridge-nuki) or (homebridge-nuki-smart-lock). Update the pluin if needed. - Check API Setting: Go to the Nuki app, navigate to Settings > Manage Bridge > Api and ensure the API is enabled.
- Confirm Local Network Access: If you are using the Nuki Bridge, check that it is on the same Wi-Fi network as your HomeBridge server.
- Validate Nuki Bridge IP Address: If HomeBridge relies on a static IP, confirm that the Nuki Bridge has a reserved IP in your router settings.
- Restart Nuki Devices: Power cycle both the Nuki Smart Lock and the Nuki Bridge to refresh connections.
- Check Log Files: Look at the HomeBridge logs for errors related to the Nuki plugin and troubleshoot based on the messages.
- Test API with Browser: Open a browser and enter
http://<nuki_bridge_ip>:8080/info, replacing<nuki_bridge_ip>ith your Nuki Bridge's IP address. If this fails, check network and API settings.
HOOBS Solution
The most often used way to connect incompatible smart gadgets to Apple HomeKit is HOOBS. HOOBS (HomeBridge Out of the Box) is basically an update of HomeBridge. HOOBS was also a great solution to Apple HomeKit Nuki integration.
Features
- Seamlessly integrates with Apple Home
- Easy setup
- Affordable solution
- Best alternative to Homebridge
- Plug-and-play solution
Step-By-Step Guide to add Nuki Devices to HomeKit using HOOBS
- Install HOOBS on a Raspberry Pi or any other suitable hardware.
- Visit the HOOBS dashboard.
- Go to the Home App.
- Select "Add Accessory".
- Select the HOOBS server.
- Scan the QR code displayed on-screen.
- Finally, follow the on-screen instructions.
Connect Nuki to HomeKit
Now you can control your smart door lock via Siri with voice commands and include Nuki in smart home scenarios.
Why connect Nuki with HomeKit?
- Operate Nuki via voice commands with Siri
- Integrate Nuki into HomeKit automations and scenes
- Get notifications on Apple devices (iPhones, Apple Watch, etc.)
- Other Apple users can operate the devices.
- Connect Nuki with other smart devices
Step-by-step guide to connect Nuki smart lock Apple HomeKit
- Open the Apple HomeKit app on your smartphone
- Click on the ‘+ icon’ at the top right of the screen
- Choose ‘New accessory’
- Scan the HomeKit QR code of your Nuki Smart Door lock
- Assign the smart door lock to a room
Troubleshooting Tips: Nuki Not Discoverable by HomeKit
- Ensure HomeKit Compatibility: If you are using the Nuki Smart Lock 3.0 Pro, it should natively support HomeKit. The standard Nuki 3.0 requires a Nuki Bridge for integration.
- Reset HomeKit Pairing: In the Nuki app, go to Setting > HomeKit, remove the existing pairing and re-add it.
- Check HomeKit Code: When pairing, ensure you are using the correct HomeKit QR code found in the Nuki app under Settings > HomeKit.
- Verify Bluetooth and Wi-Fi: The Nuki Smart Lock needs a stable Bluetooth connection and must be on the same Wi-Fi network as your HomeKit hub (Apple TV, HomePod or iPad).
- Restart Devices Restart your Nuki Smart Lock, HomeKit hub and iPhone to refresh connections.
- Update Firmware & iOS: Mke sure your Nuki device firmware and iOS are up to date.
- Check Home App & iCloud: Ensure your iCloud account is signed in and Keychain is enabled under iCloud settings.
- Factory Reset Nuki: As a last resort, perform a factory reset on the Nuki Smart Lock and set it up again from scratch.
Disclaimer: Taking part in third party integrations can be risky and dangerous.
Connect Nuki with Alexa
To integrate Nuki with Alexa, you can follow the steps below.
- Go to ‘Settings’
- Click on ‘Functions & Integrations’
- Choose ‘Activate Nuki Web’
- Also select ‘Amazon Alexa’ under ‘Functions & Integrations’
- Now click on ‘Connect’
After following these steps, you can now operate the Nuki door lock with Alexa.
Nuki Matter Compatibility
The 4th generation of Nuki Smart Locks now supports Matter. To integrate your Smart Lock into your Smart Home you need a suitable hub that supports Matter via Thread. You can include devices from Apple Home, Google Home, Samsung SmartThings, and Amazon Alexa. Activate Matter via the Nuki app when you set up your device. This marks the beginning of a new era for Smart Homes.
How to Use Matter with Nuki
- Acquire a Matter Controller compatible with the smart home platform you prefer, example. Apple HomePod, Apple TV
- Download the Home app.
- Set up devices with Nuki app or the by scanning the Matter QR code.
- In the app, manage the Matter connection.
Nuki Smart Lock Pro (4th generation)
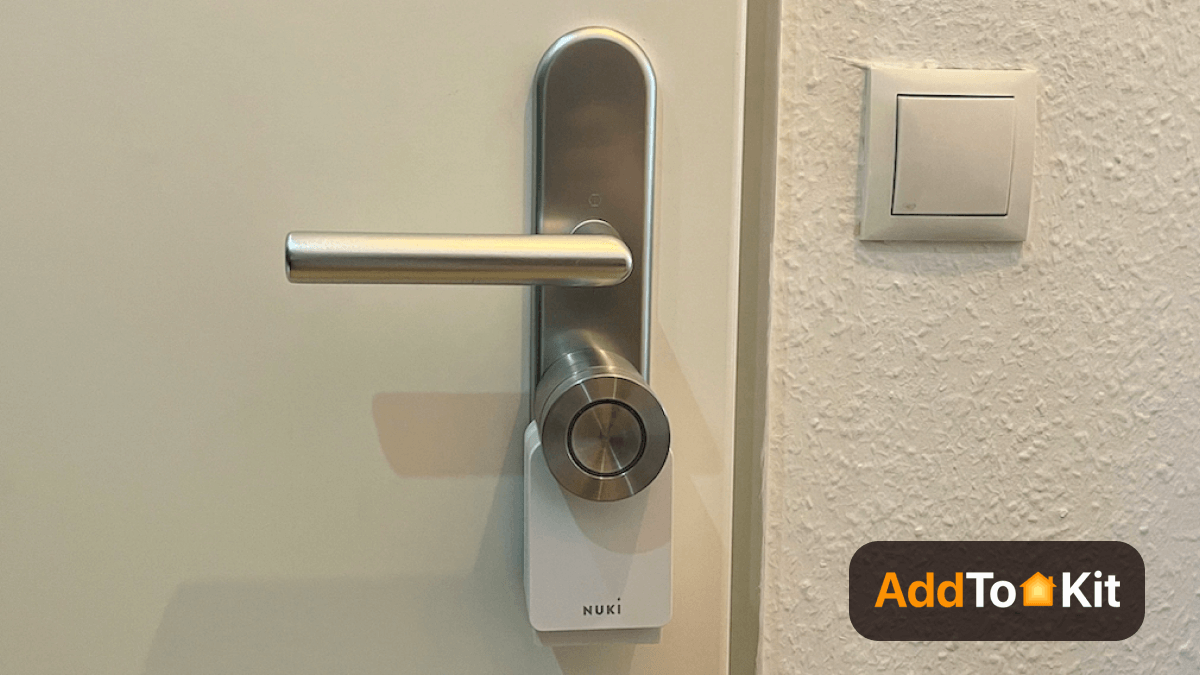
With Nuki Smart Lock Pro, now you can use your smartphone as a key. You can grant access to guests at specific times with the Nuki app. Another surprise! Now you can connect the Nuki smart door lock to your smart home via Matter.
- Lock or unlock your door via your smartphone
- Automatic unlocking when you’re nearby
- With built-in Wi-Fi for remote access
- Nuki Power Pack included
- Also available in white
- Complete control over who can open your door
Pros and Cons
Pros
- Easy and quick to install
- Matter compatible
- Can control the lock remotely
- Can automatically opens when you're within a certain range
Cons
- The battery drains quickly if you use the lock often
Which Nuki HomeKit Method Should You Choose?
Use Native Apple Home Integration if:
- Your Nuki lock already supports HomeKit or Matter
- You want the simplest setup
Use AddtoHomeKit if:
- You want the easiest overall method
- You want guided setup
- You want to avoid technical work
Use ATH Bridge if:
- You want a plug-and-play hardware solution
- You don't want to configure software
Use Homebridge or HOOBS if:
- You are comfortable with technical setup
- You want full control and customization
Editor’s Pick
In my experience I would definitely go with AddtoHomeKit. It is easy and very user-friendly! You don’t even have to download anything. That’s why I selected AddToHomeKit! While I recommend you use AddtoHomeKit to add any Nuki devices to Apple HomeKit, it is important to consider your situation, and which is your preferred solution is.
FAQs
No, a Nuki Bridge is not necessary to connect Nuki with HomeKit.
You can find it on the back of the Nuki Smart Lock. Also, you can get QR code in the enclosed manual in the Nuki packaging.
You can control your door lock with Alexa Skills via the Nuki web. Because Nuki supports Alexa voice assistant.
No, current Nuki smart locks do not support Apple Home Key. Nuki has indicated support for future standards like Aliro but Home Key is not currently available.