
How to Add Any Ring Device to Apple HomeKit

Just when you were about to give up on integrating Ring devices to apple HomeKit. I am going to twist that decision. That rule isn't unbreakable as it seems. Using third party solutions you can make them work together. In this article, I will introduce you to those clever solutions.
Best Solutions to Connect Ring Devices to Apple HomeKit:
- AddtoHomeKit [Recommended Solution]
- ATH Bridge
- HOOBS
- HomeBridge
If so, you have come to the right place I have found the best solutions to connect Ring smart devices to Apple HomeKit with the magic of great third-party integration.
AddtoHomeKit [Recommended Solution]
First and foremost, the best option in my opinion, Ring AddtoHomeKit. Just like its name suggests, it simply adds your incompatible Ring to the Home app, whether it be your Ring cameras or even your Ring doorbells, it will integrate these Ring devices with Apple Home Kit.
It is basically a software solution that allows you to add Ring camera to Apple Home or even add Ring doorbell to a HomeKit. They offer hundreds of plugins that you can utilize to make Ring work with HomeKit.
Why Use AddtoHomeKit
- No need to download bulky apps.
- Simple App based solution.
- Easy and low effort.
- Gives you a seamless experience.
- Less time-consuming.
- Little bit of coding knowledge needed.
- Very much simplified.
How to Operate Any Ring Device to HomeKit with AddtoHomeKit
- Vist the AddtoHomeKit official website
- Select your "Ring" as the ecosystem.
- Once directed to the next page, select your preferred solution and click "Add to Home"
- Afterwards, select your preferred and available operating system
- Now install the HomeBridge Plugin given, click "install"
- Now click on the activation package
- Follow the instructions dispalyed on screen
Key Takeaways
- Ring devices don’t natively work with Apple HomeKit.
- Use third-party solutions: AddtoHomeKit, ATH Bridge, HOOBS, HomeBridge.
- Ensure devices are online, updated, and have a HomeKit QR code.
- Troubleshoot Wi-Fi, firmware, and HomeHub issues for smooth integration.
- Enable HomeKit automation and security features for smarter control.
ATH Bridge
ATH Bridge is basically a plug and play solution, a pre-installed HomeBridge hub. It is compiled and pre-flashed to the HomeBridge server and is a budget friendly and an easy solution. You must just download the plugins and configure them.
Alternative Options to Setup Ring Devices to Apple HomeKit
There are some alternative methods that you can use to integrate any Ring devices. Not only these solutions, you can also connect any smart home device to Apple HomeKit with Enomek. Actually, it is a app solution!
HOOBS Solution
HomeBridge Out of the Box or HOOBS for short, is one of the most popular open-source solutions. It is a software platform that allows you to set up and operate HomeBridge. It is very user-friendly and compatible if you are looking to connect Ring devices with Apple HomeKit maybe control ring camera remotely. Unlike the AddtoHomeKit method, this solution requires a bit of coding knowledge.
How to Add Ring Devices to Apple HomeKit with HOOBS
- Install HOOBS on any hardware, for example, Raspberry Pi.
- Visit the HOOBS dashboard.
- Click the Bridges options.
- Click on the "Add Bridge" button.
- Click "Save" and you will recieve a notification at the bottom right corner of the interface.
- From the list of bridges, click on the bew bridge you just created and a OR code will appear to pair with HomeKit.
- Go to HomeKit and choose "Add Accessory" and now scan the QR code.
- Finallly, select a "room" to place the bridge in and enjoy!

HomeBridge Solution
Unlike AddtoHomeKit which requires little to no technical knowledge, HomeBridge requires technical knowledge. If you lack the needed knowledge like me, this option can be complicated due to the need for coding. Like HOOBS which is an update of this HomeBridge, HomeBridge is also an open-source software that integrates incompatible devices with Apple HomeKit. You will again need to acquire hardware such as Raspberry Pi to run HomeBridge.
How to Add Ring Devices to Apple HomeKit with HomeBridge
- Install Homebridge on a Raspberry Pi, always-on PC, or Mac.
- Open the Homebridge dashboard, go to Plugins, search for @homebridge-ring and install it.
- Open the plugin settings. You will need to generate a Ring Refresh Token — the plugin no longer uses email/password. Follow the on-screen token generation steps or visit the Ring refresh token guide.
- Enter your refresh token and save the configuration.
- Restart Homebridge.
- Open the Apple Home app, tap + → Add Accessory, and scan the QR code from your Homebridge dashboard.
- Your Ring cameras, doorbells, motion sensors, and alarm panels will appear in Apple Home.
Note: Two-factor authentication is supported and strongly recommended on your Ring account.
If you want to HomeBridge step-guide with more details check out how to add Ring devices to Apple HomeKit using Homebridge.
Scrypted (Best for Ring Cameras + HomeKit Secure Video)
If your main goal is adding Ring cameras to Apple HomeKit with HomeKit Secure Video (HKSV) and low-latency live streaming, Scrypted is the best purpose-built solution. It streams video directly to HomeKit without going through Ring's cloud.
What You Need
- A local server running Scrypted (via Docker on a PC, Mac, or Raspberry Pi)
- Ring account with two-factor authentication
Steps
- Install Scrypted on your local server via Docker or the native installer.
- Log into the Scrypted management console, go to the Plugin Store, and install the Ring plugin.
- Authenticate with your Ring account using your login and two-factor code.
- Select your Ring camera in Scrypted and click the HomeKit option — a pairing QR code will appear.
- Open the Apple Home app, tap + → Add Accessory, and scan the code.
- Your Ring cameras will appear in Apple Home with full HomeKit Secure Video support.
Why Scrypted over Homebridge for cameras? Scrypted provides significantly lower live feed latency, native HomeKit Secure Video recording, and more reliable motion event streaming compared to the Homebridge Ring plugin.
Troubleshooting Common Issues
- Ensure Ring Device is Set Up in the Ring App
- Before integrating your Ring device with HomeKit, make sure it’s properly set up and functioning in the Ring app.
- Verify that the device is online and working in the Ring app before attempting to add it to HomeKit.
- Confirm Bridge Plugin Compatibility
- Ring devices have no native HomeKit support. Before troubleshooting, confirm your Ring device model is supported by your chosen bridge (AddToHomeKit, ATH Bridge, HOOBS, Homebridge, or Scrypted). Check the plugin's documentation for the current supported device list.
- HomeKit support should be indicated in the device description or packaging, or you can check the product details in the Ring app.
- Check Ring HomeKit Setup Code
- To add a Ring Camera to HomeKit, you need the HomeKit setup code (either a QR code or an 8-digit code).
- You can find this setup code in the Ring app under device settings or on the back of the device itself. Make sure you have the correct code before trying to pair it.
- Verify Wi-Fi Network Connection
- Ensure both your Ring device and your iPhone/iPad are connected to the same Wi-Fi network. This is important for HomeKit to work properly.
- If your network has separate 2.4 GHz and 5 GHz bands, try connecting your Ring device to the 2.4 GHz band, as many IoT devices do not support the 5 GHz band.
- Restart Ring Device
- If the device is not showing up in HomeKit or is behaving unexpectedly, try restarting your Ring device.
- In the Ring app, you can disable and re-enable the device or perform a hard reset if necessary (refer to your specific Ring device’s manual for reset instructions).
- Ensure the Ring App is Updated
- Make sure you are using the latest version of the Ring app. Go to the App Store and check for any updates for the Ring app.
- Keeping your Ring app updated ensures compatibility with HomeKit and resolves potential bugs.
- Re-add Ring Device to HomeKit
- If the Ring device was previously added to HomeKit but is no longer working, you may need to remove it and add it back.
- Open the Home app on your iPhone or iPad.
- Find the device and remove it by pressing and holding the device, then selecting Remove Accessory.
- Scan the HomeKit QR code again from the Ring app or enter the 8-digit code to re-pair it.
- Check for HomeHub Connectivity
- If you're controlling devices remotely (outside your home), ensure that your HomeKit hub (Apple TV, HomePod, or iPad) is working correctly.
- Your HomeKit hub should be connected to the same Wi-Fi network as the Ring device and remain powered on and updated.
- Update Ring Device Firmware
- Firmware updates are crucial for the Ring device to function correctly, especially when using HomeKit. In the Ring app, go to the Device Settings and check for any available firmware updates.
- Make sure that both the device and the Ring app are up-to-date.
- Check Router Settings
- Ensure that your router is not blocking communication between your Ring device and your iPhone.
- If you have custom firewall or security settings on your router, they may interfere with HomeKit. Temporarily disable any firewalls or VPNs to see if it resolves the issue.
- Reboot Your Router
- Sometimes, network communication issues can be fixed by simply restarting your router. This can help if your Ring device is not showing up in HomeKit.
- Check for Interference
- If you're using a VPN on your device, it may block local network communication, causing issues with HomeKit. Disable the VPN temporarily and check if this resolves the issue.
- Similarly, ensure your router firewall settings are not blocking HomeKit-related traffic.
- Reboot Your iPhone or iPad
- A simple restart of your iPhone or iPad can sometimes resolve HomeKit connectivity issues, especially if the Home app or your device’s HomeKit configuration is acting up.
- Test with Another Device
- If your Ring device works on one iOS device but not another, try adding the device to HomeKit on a different iOS device to rule out issues with your phone or tablet.
Please note that using the third-party solutions could pose risks.
Why are Ring Smart Devices Incompatible with HomeKit
Ring devices are incompatible with Apple Home Kit because they operate on a different protocol/system that HomeKit does not support. Apple HomeKit requires devices to meet certain standards and protocols such as security standards to ensure that they can seamlessly integrate and communicate with the Apple ecosystem, including devices such as the iPad or iPhones. As Ring devices do not meet these specific standards and protocols, HomeKit without the use of a third-party integration or software.
But not to worry because these methods I have mentioned helps you with not only Ring but all other smart devices such as integrating SwitchBot Devices with Apple HomeKit.
Comparison Between Ring App and Home App
| Feature | Ring App | Apple Home App |
|---|---|---|
| Privacy Features | Has privacy settings for video and audio recordings | It has built-in privacy features, end-to-end encryption for HomeKit compatible devices only |
| Remote Control | Yes | Yes |
| Device Control | Can control Ring devices (Ring cameras, Ring doorbells etc.) | Can control HomeKit integrated devices |
| Alerts | Can receive alerts if there is motion and doorbell rings | Can receive alerts from various devices |
| Video playback | View recorded video footage | View live and recorded video footage |
| Interface | Ring specific interface | Apple’s unified inface for all connected smart home devices (if they are integrated with HomeKit) |
Does Ring Have a Native HomeKit Option?
No. Ring previously offered a HomeKit toggle in the Ring app for select devices, but this has been removed. As of 2026, Ring has no native HomeKit integration path — and Ring devices do not support Matter. The only working methods are the third-party bridge solutions listed above.
What’s New on Ring Home Security Cameras
1. Higher-Resolution Cameras
- New 2K and 4K “Retinal Vision” cameras give sharper video, better low-light performance, and up to 10× zoom.
- Older models like Floodlight Cam Pro got firmware upgrades to 2K.
2. Smart AI Alerts
- Motion alerts now include descriptions.
- Familiar Faces feature reduces nuisance alerts by recognizing family/friends.
3. Enhanced Subscription Features
- 24/7 continuous recording on select cameras.
- Video Preview Alerts and Extended Live View for faster access.
- Doorbell calls trigger phone-style alerts for instant notifications.
4. Community & Automation Features
- Alexa+ Greetings lets Ring interact with visitors automatically.
- Better HomeKit and smart home integration for automation.
Enhancing Security with Ring and HomeKit
- Utilize Two-Factor Authentication:
- Create Secure Zones:
- Integrate with Other Security Devices:
- Regularly Check Device Status:
Ensure you have two-factor authentication enabled for added security on your Ring account.
In the Ring app, set up “geofencing” to define secure areas around your home. This helps you receive alerts when someone enters or exits these zones.
Pair your Ring device with other HomeKit compatible security devices, like smart locks or cameras to create a comprehensive security system.
Use the Home app to monitor the status of your Ring devices and ensure they are functioning correctly. Set up notifications for when doors are unlocked, or motion is detected.
Ring Alarm HomeKit
When integrated with Apple HomeKit, Ring Alarm offers the following functionalities:
- Arm/Disarm
- Monitor Keypad Battery
- Triggered Alarms
- Emergency Buttons
Ring Video Doorbell Apple HomeKit
Integration between Ring Doorbell HomeKit provides the Ring video doorbell with several functionalities:
- Ring doorbells offer all the functionalities of Ring cameras, including live streaming, two-way audio, and motion-sensing notifications.
- The integration allows users to trigger scenes when the doorbell button is pressed.
- Users receive notifications and snapshots when the doorbell is pressed, directly through the Home app.
- Users can set up their HomePod to chime when the Ring doorbell rings, enhancing the notification system.
Editors's Pick
I hope after reading this article you understood that Integrating your Ring devices into Apple HomeKit doesn’t have to be complicated. For myself, I would go with AddtoHomeKit solution to build a Ring HomeKit. AddtoHomeKit makes it quick, simple, and reliable, even for the busiest users. Pick the method that works best for your setup and enjoy the full power of a unified smart home with minimal effort.
FAQ
As of now, Ring does not natively support Apple HomeKit. This means you cannot directly connect your Ring doorbell or Ring camera to the Apple Home App. However, there are third-party solutions such as AddtoHomeKit that can help integrate Ring with HomeKit.
Ring works with Amazon Alexa and Google Homes even Apple Home App if you integrate Ring devices to HomeKit. These platforms offer a seamless integration with Ring cameras and Ring Doorbells. If you are looking to use Apple Hime hubs, you can use Apple HomePod or Apple TV to control Ring devices if you integrate them with HomeKit.
Currently they do not. Ring does not have any officially approved Matter-compatible devices.
Not directly. Ring devices cannot be connected to HomeKit direclty without the use of a third-party solution. By setting up a thrid-party solution such as the methods mentioned above (most recommended being AddtoHomeKit) you can connect your Ring Doorbell and Ring Cameras to the Home app and Apple HomeKit.
Yes, Ring does have Home Automation features. You can link Ring devices with other smart devices through platforms such as the Alexa and Google Home (also Apple Home if you integrate them with HomeKit) It allows you to automate actions such as turning on the lights if the Ring Camera detects motion.
No, Ring doorbells are not natively compatible with Apple HomeKit. However, you can integrate them using third-party solutions like AddtoHomeKit, HOOBS and ATH Bridge.
No, it's primarily designed to work with Amazon Alexa. But you can connect them using third party integrations.

Read more
How to Add Any Hive Smart Devices to Apple HomeKit
I recently transformed my analogue home into a smart home and have been mostly relying on Hive smart devices, and as an iPhone user, I was mostly confused about how to add Hive smart devices to Apple HomeKit. So, here is an article on what I found and experienced in
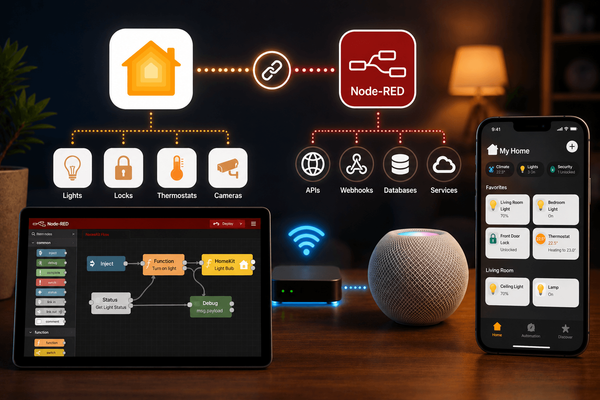
Integrating Apple HomeKit with Node-RED: A Complete Guide
Node-RED connects to Apple HomeKit through a community node called NRCHKB (node-red-contrib-homekit-bridged), which creates virtual accessories that the Home app can see and control. This lets you bring MQTT, HTTP, Zigbee, Z-Wave, and KNX devices into Siri and the Home app without native HomeKit support. For users within the Apple
How to Add Aqara Devices to HomeKit: Step-by-Step (2026)
Aqara works with Apple HomeKit in two ways: natively via an Aqara Hub (M2, M3, M200, or G3), or directly via Matter for newer Wi-Fi and Thread-based devices that no longer require a hub at all. If you have an older Aqara device or one that doesn't support
How to Add Any Govee Devices to Apple HomeKit
If you’re a proud owner of Apple HomeKit and Govee Smart Home Devices, you probably want to control your Govee with Apple Home App and Siri. But how? Don’t worry! I have top solutions to integrate your Govee to HomeKit. 💡Quick Answer Govee does not officially support Apple