How to Add Aqara Smart Devices to Apple HomeKit
Aqara is amazing, so imagine how powerful Aqara HomeKit would be. Unfortunately, Aqara is HomeKit incompatible unless you had a hub. There are a few third-party solutions you could use to add Aqara to Apple HomeKit such as,
- AddtoHomeKit [Recommended Solution]
- ATH Bridge
- HOOBS
- HomeBridge
AddtoHomeKit [Recommended Solution]
Aqara AddtoHomeKit was definitely my favourite solution. It is very easy to use, has a very user-friendly interface. Most of all it takes no effort or time to create Aqara HomeKit. You can create Aqara Outdoor Camera HomeKit as well.
Benefits of AddtoHomeKit
- It has thousands of plugins that you can use
- Easy installation
- User-friendly interface
- Amazing service and compatibility
- Easy to setup Aqara HomeKit
Let me elaborate, so they provide thousands of plugins that allow you to add any smart device to Apple HomeKit. Another reason I recommend AddtoHomeKit is because of how little coding knowledge it requires.
If you are wondering if you can create Aqara Camera HomeKit or Aqara Doorbell HomeKit, it is possible! Also, they provide recommended software solution, recommended hardware solution and some brand specific product solution.
ATH Bridge
ATH Bridge is a devices solution. It is a plug-and-play system with a pre-installed HomeBridge hub. It is pre-flashed and specifically compiled for the HomeBridge server; all you need to do is download and set up the plugins and boom you will have an Aqara HomeKit integration.
Benefits of ATH Bridge
- Reasonably priced
- Simple plug-and-play solution
- Setup requires little work
- Easy to understand and implement
HOOBS Solution
If you want to have a Aqara security system within the Apple Home app, you could use all these solutions as well. HOOBS (HomeBridge Out of the Box) is another method for this. All you must do is start HomeBridge and set up the process. It enables you to operate the Apple Home app or use the Siri voice commands function.
Benefits of Using HOOBS
- User-Friendly Interface
- Wide Compatibility
- Simplifies HomeKit Integration
- Easy Plugin Management
- Cross-Platform Support
Add Aqara to HomeKit to benefit from the best seamless and smooth smart home operations.
HomeBridge Solution
If you have good technological expertise, HomeBridge would be the most suitable choice for you. It serves as a platform for open-source software. It integrates non-HomeKit compatible devices with Apple HomeKit.
Benefits of HomeBridge
- Connectivity to Apple's HomeKit network
- Adaptable
- It is very versatile, you can even add Xiaomi to HomeKit. Almost all integrations can be done!
How to Use the Above Solutions to Add Aqara to HomeKit
Step-By-Step Guide to Use AddtoHomeKit
- Visit the AddtoHomeKit official page
- Select the preferred ecosystem
- Select the preferred solution
- Select the preferred Operating System
- Select and install the HomeBridge Plugin
- Now select the Activation Package
- Then, follow the on-screen instructions as mentioned
Step-by-Step Guide on Using HOOBS
- Set Up HOOBS
- Install the Aqara Plugin
- Pair Aqara Devices
- Fixing "No Response Errors"
- Integrating Aqara Devices in HomeKit
- Securing Your Home with Aqara
First, ensure that you have HOOBS (Homebridge Out of the Box) installed and running. HOOBS makes integrating Aqara with HomeKit simple, even for non-techies.
1. Open the HOOBS interface by going to http://hoobs.local/ on your browser.
2. Log in using your credentials.
3. Now, you'll need to add the correct plugin. In the HOOBS dashboard, click on the Plugins tab and search for “Aqara HomeKit Integration” to find the right plugin for your Aqara devices.
Select the Aqara plugin and click Install.
Once installed, configure the plugin by adding your Aqara hub information.
Tip: Make sure your Aqara hub is already set up and connected to your Wi-Fi network.
After installing the plugin, it’s time to pair your Aqara devices. Here’s how to integrate different devices:
Aqara Camera: If you're adding an Aqara HomeKit camera, press the reset button on the camera, and it will show up in the HOOBS interface under the camera section.
Aqara Doorbell: Similar to the camera, press the pairing button on the Aqara doorbell. Once it’s in pairing mode, HOOBS should automatically detect it.
Aqara Lock: For locks, place the lock in pairing mode following Aqara's instructions, and it will appear in the HOOBS interface for you to add.
Aqara Security System: To integrate the security system, ensure your hub is connected, and then follow similar steps by pairing your sensors and alarms through the HOOBS dashboard.
If you encounter an Aqara HomeKit no response issue, it could be due to network connectivity. Here's a quick fix:
Ensure all devices, including the Aqara hub, are on the same Wi-Fi network.
Restart both the Aqara hub and your router to re-establish connections.
Refresh the devices in the HOOBS dashboard by clicking the refresh icon in the plugin.
Once your Aqara devices are connected to HOOBS, open the Apple Home app on your iPhone or iPad.
Tap the + button in the top-right corner.
Select Add Accessory and scan the HomeKit code on your Aqara hub or device.
Your Aqara homekit integration will now appear in the Home app, allowing you to control all your devices from one place.
Using your Aqara HomeKit security system, you can now automate your home with advanced security features. Control locks, cameras, and motion sensors easily through the Apple Home App.
You can set up automations, such as having the Aqara HomeKit lock automatically secure your door when you leave home or activate your camera when motion is detected.
To keep everything working seamlessly, periodically check for firmware updates via the HOOBS plugin interface.
Step-By-Step Guide on HomeBridge
-
Set Up Homebridge
Make sure you have Homebridge installed and running on your device (Raspberry Pi, macOS, or Windows).
Open the Homebridge UI by visiting http://homebridge.local/
If you’re new to Homebridge, follow the Homebridge installation guide.
Log in to your Homebridge dashboard.
-
Install the Aqara Plugin
Navigate to the Plugins tab in Homebridge.
Search for "Aqara HomeKit Integration" or homebridge-aqara
Click Install to add the plugin.
Once installed, configure the plugin to connect with your Aqara hub by adding its IP address and key. You can find these in the Aqara app.
-
Configure Plugin
In the Config section of the Homebridge UI, add the following configuration:
{
  "platforms": [
    {
      "platform": "Aqara",
      "ip": "YOUR_AQARA_HUB_IP",
      "key": "YOUR_AQARA_HUB_KEY"
    }
  ]
}
Save the configuration and restart Homebridge.
-
Pair Aqara Devices
After setting up the Aqara hub in Homebridge, pair your Aqara devices one by one. Here’s how to integrate various devices:
Aqara HomeKit Camera: Put the camera into pairing mode by pressing the reset button. It should show up in the HomeBridge interface and Apple Home app.
Aqara Doorbell: Press the pairing button on the doorbell, and it will be detected by HomeBridge. Once detected, it will appear in the Home app.
Aqara Lock: Follow Aqara's instructions to put the lock into pairing mode. Once paired with the hub, it will sync with HomeBridge and the Home app.
Aqara Security System: For the security system (motion sensors, door/window sensors), add each device through the Aqara app. They will automatically sync with HomeBridge and appear in the Home app.
-
Integrating Aqara Devices into HomeKit
With everything configured in HomeBridge, you can now control your Aqara devices to the Home app.
Open the Apple Home app on your iPhone or iPad.
Tap the + button in the upper-right corner and select *Add Accessory*.
Scan the HomeKit code from your Aqara hub or devices, and they will appear in the Home app for control.
Your integration is complete, and you can now manage all your Aqara devices through the Home app.
-
Set Up Automations and Security
Now that all your Aqara devices are added, you can set up automations for your smart home:
Use your Aqara HomeKit lock to automatically lock doors when leaving or unlock them when you return.
Automate your Aqara HomeKit security system to alert you when motion is detected, or doors/windows are opened.
Integrate your Aqara HomeKit camera with HomeKit Secure Video for enhanced security.
Read More:
- How to Add Any SmartWings Devices to Apple HomeKit
- How to Add Any Hikvision Devices to Apple HomeKit
- How to Add Blink Camera to Apple HomeKit
How to Use Aqara Hubs to Connect to Apple HomeKit
If you are willing to purchase a Aqara Hub, you can create a Aqara Apple Home app integration with the Aqara Hubs. You must follow the following procedure:
- Set Up the Aqara Hub:
- Pair the Hub with Aqara App:
- Add Accessories:
- Control with Siri:
- Plug in the Aqara hub and power it on.
- Download the Aqara Home app on your smartphone (it is available on iOS App Store).
- Create/ log into your Aqara account.
- Open the Aqara Home app, click the + icon, and follow the on-screen instructions to add your hub.
- Ensure your hub is connected to the same Wi-Fi network as your iPhone.
- After pairing the hub, you can start adding Aqara devices like sensors, switches, or cameras.
- The Aqara hub will act as a bridge, allowing all connected accessories to be controlled via Apple Home.
- You can now control your Aqara devices using Siri commands or through the Apple Home app on your iPhone, iPad, or Apple Watch.
Best Aqara Hubs
There are a few hubs that you can use for Aqara Apple HomeKit, but I highly recommend the below two hubs they work flawlessly and support MULTIPLE protocols! As per my experience I highly recommend you opt for either one of these two hubs:
- Aqara Hub M2
- Aqara Hub M3
Aqara Hub M2
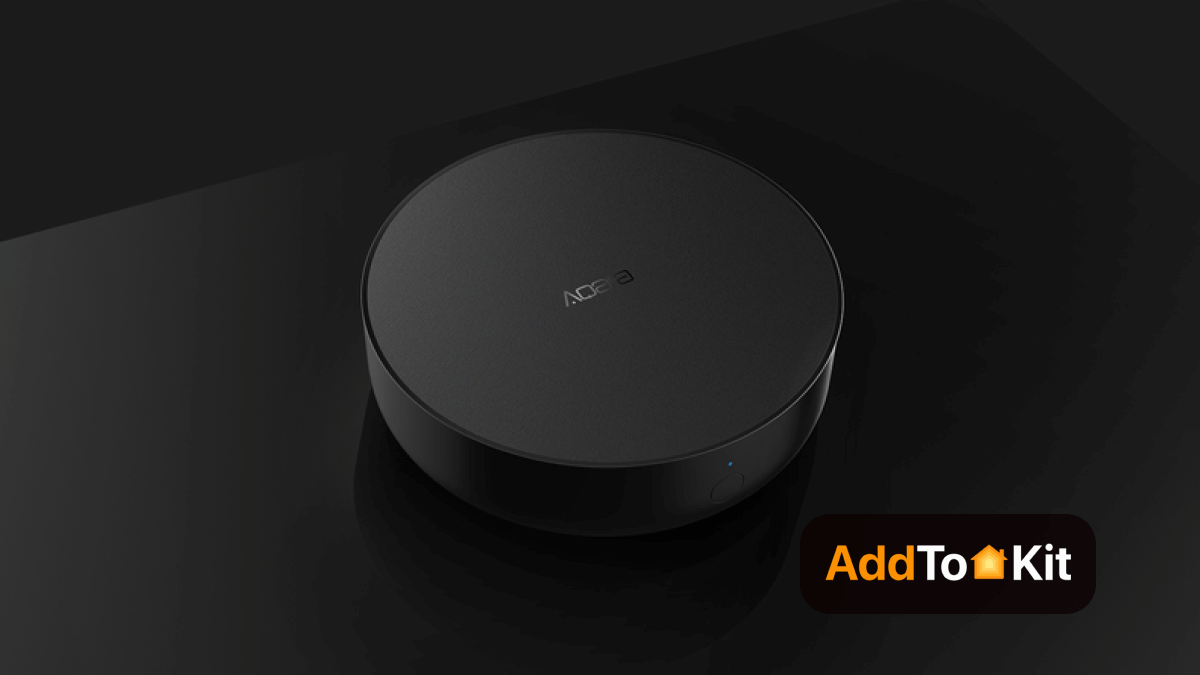
The Aqara Hub M2 is a multipurpose smart home hub that works with Bluetooth, Wi-Fi, and Zigbee among other protocols. It acts as the hub for the entire Aqara smart home automation and monitoring system, making it simple to monitor and operate.
Key Features
- Matter Compatibility (Firmware Update 4.0.0 Beta): The Aqara M2 now serves as a Matter bridge, thanks to its latest beta firmware (version 4.0.0). This means you can seamlessly integrate your Zigbee devices into major smart home platforms like Apple HomeKit, Google Home, and Samsung SmartThings. This hub is one of the best Aqara Matter compatible devices!
- Zigbee 3.0 Support: Acting as a Zigbee coordinator, the Hub M2 lets you connect and manage a variety of Zigbee-compatible devices, both from Aqara and other brands.
- Wi-Fi and Bluetooth Ready: Alongside Zigbee, the Hub M2 supports Wi-Fi and Bluetooth, giving it the flexibility to connect with a broad range of smart devices.
- Remote Control Anywhere: With the Aqara Home app, you can easily check in on your devices remotely, control your home, and get real-time notifications for important events.
- Custom Automation & Scenes: You can set up personalized automation and scenes to simplify daily tasks. For example, have your lights automatically turn on when you arrive home or schedule your smart plugs to switch off at night.
- Voice Assistant Integration: The Hub M2 works seamlessly with Amazon Alexa, Google Assistant, and Apple HomeKit, so you can use voice commands to control your smart home.
- Sleek Design: With its compact, modern design, the Hub M2 fits anywhere in your home without taking up much space.
- Local Control for Speed & Security: Local control ensures your devices respond quickly and keeps things secure, with all interactions happening within your home’s network.
- Built-in Speaker: The Hub M2 comes with a handy built-in speaker for security alerts, doorbell sounds, alarms, and even custom ringtones.
Aqara M3 Hub
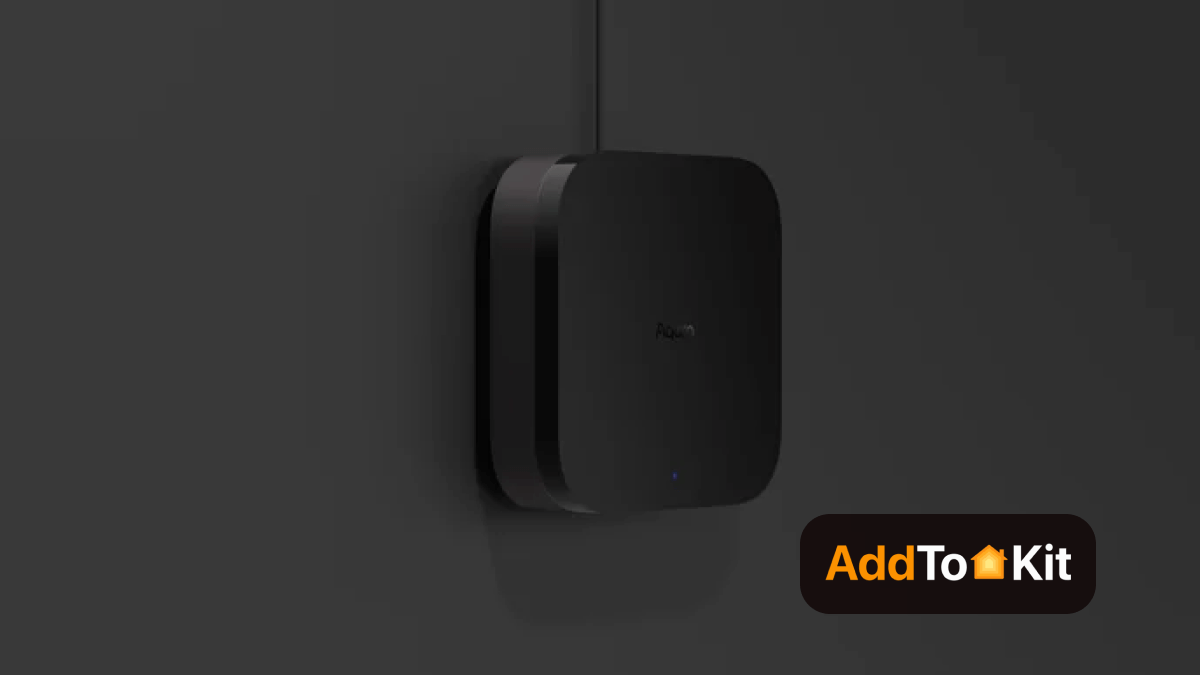
With compatibility for ZigBee, Thread, and Matter protocols, the Aqara M3 ZigBee Hub is a Matter smart home hub that offers seamless connectivity across a variety of smart devices. It offers an incredibly flexible way to manage your smart home ecosystem.
Key Features
- Multiple Protocol Support: The Aqara M3 Hub stands out by supporting Zigbee, Thread, and Matter protocols, making it versatile enough to function as a Zigbee or Matter hub. This broad protocol support ensures seamless compatibility with a variety of smart home devices.
- gbee Hub: As a dedicated Zigbee hub, the Aqara M3 offers stable, low-power connectivity for both Aqara and third-party devices, delivering reliable performance across your smart home setup.
- Thread Hub: The inclusion of the Thread protocol improves connectivity and enhances performance, ensuring your smart devices operate efficiently and smoothly.
- Matter Hub: With Matter support, the Aqara M3 Hub provides interoperability across multiple smart home platforms, making device integration easier than ever.
- User-Friendly App: The Aqara Home app allows effortless control of all your devices. Manage everything from automation and monitoring to device control, and create custom routines, all from anywhere with the app’s intuitive interface.
- Voice Assistant Integration: The Aqara M3 works with leading voice assistants like Amazon Alexa and Google Assistant, giving you the convenience of hands-free control. Easily manage your devices with simple voice commands and simplify your daily tasks.
- Secure Local Control: Benefit from local control and secure data storage, ensuring your information remains private. The hub also supports cloud integration when needed for enhanced flexibility.
- Compact Design: The Aqara M3 Hub’s sleek, compact design ensures it fits into any room without being obtrusive. Its modern look complements a wide range of home styles and décor.
- Built-in Speaker: Equipped with a built-in speaker, this hub can double as a security alarm or doorbell through customizable automations, adding another layer of functionality to your smart home.
- Ecosystem Support: The Aqara M3 Hub supports a variety of ecosystems, including Apple HomeKit, Amazon Alexa, Google Home, Samsung SmartThings, Home Assistant, and Homey, providing you with maximum flexibility across platforms.
Aqara Home Assistant
- Using Zigbee Stick - Connect Aqara devices via a Zigbee USB stick, like the ConBee II or Sonoff Zigbee 3.0 USB dongle, using ZHA or Zigbee2MQTT. Home Assistant will detect and pair the Aqara Zigbee devices directly, so you can control them locally without an Aqara hub.
- Through the Aqara Hub - Connect the Aqara hub to Home Assistant using the HomeKit Controller integration, so some devices connected to the hub will show up in Home Assistant. This is good if you already have Aqara devices with the Aqara app and want to bridge them to Home Assistant.
- Matter (if available) - For newer Aqara hubs with Matter support, this will be even smoother and you won’t need to configure Zigbee specific settings.
Troubleshooting - Common Issues & Fixes
- Aqara Device Not Pairing in Zigbee2MQTT
- Make sure your Zigbee dongle is working and Zigbee2MQTT is running.
- Reset the device before pairing (hold the button until it blinks rapidly).
- Place the device close to the dongle for initial pairing.
- Check the Zigbee2MQTT logs for any error messages.
- Devices Not Showing in HomeKit
- Confirm the device appears in the Homebridge UI.
- Restart Homebridge after adding new devices.
- Double-check the plugin config (especially MQTT details for Zigbee2MQTT).
- Make sure you added the correct Homebridge bridge to your Home app.
- Can't Get the Aqara Hub Token (using
homebridge-mi-aqara) - Consider switching to the Zigbee2MQTT method for better compatibility and support.
- Homebridge Won’t Start After Config Change
- Use Homebridge UI's Config Editor with built-in validation.
- Check logs under "Logs" tab in the UI.
- You can also revert to a backup if needed (UI > Settings > Restore Backup).
Editor's Pick
I would definitely recommend going for AddtoHomeKit, if you look for solutions to add any smart device to Apple HomeKit. It is easy, less costly, low effort and time required as well. However, if you are looking to go for the Aqara hubs, my personal favourite was the Aqara M3 Hub because it has wayyyy more features than the Aqara Hub M2! With that being said I hope you have a great home automation and a smooth experience!
FAQs
Some Aqara products are compatible with HomeKit while some are not. The compatible devices do not directly connect to your Wi-Fi network but rather they communicate through the Zigbee protocol. If you want to connect the incompatible devices with Apple HomeKit you can use third-party solutions such as AddtoHomeKit, ATH Bridge, HOOBs etc.
To link Aqara devices with HomeKit, visit the Home App > Click on “+” > Add Accessories > Options > Scan the QR code (located in the back of your product).
Some Aqara devices do, you can control Aqara devices with Siri on your iPhone, iPad, Apple Watch or HomePod. You can just say “Siri, I’m home” and the lights will automatically turn on for you. However, you might need a Aqara Hub for this.
The short answer is no. You will need the Aqara Hub if you want to control your Aqara devices through Apple HomeKit.
After disconnecting the Internet, the accessories can still be accessed via the local area network, the Hub may continue to be used normally, and the automation will continue to function as usual. However, the remote access feature will not function.
Ensure that the smartphone is linked to the hub's Wi-Fi network and launch the Aqara Home application. Choose the hub that requires updating from the device page, navigate to the hub information page, and select Firmware Update.


