How to Add Tuya Devices to Apple HomeKit

Building a smart home with Tuya devices is easy, until you try to bring everything into Apple HomeKit. That’s where most people get stuck. But with the right setup, you can unlock full control through the Apple Home app and Siri. So, let's take a loo!
Can You Add Tuya Devices to Apple HomeKit?
Yes, but in most cases not natively. Most Tuya and Smart Life devices do not appear directly in Apple HomeKit out of the box, so you usually need a third part solution like AddToHomeKit.
These are all four solutions that I found including it:
- AddtoHomeKit [Most Recommended]
- ATH Bridge [Plug and Play Solution]
- Matter-Enabled Hubs [Easiest]
AddToHomeKit [Recommended Solution]
Tuya AddToHomeKit is the best solution for those who want to add their Tuya smart home devices to HomeKit.
AddtoHomeKit
I would recommend this for anyone who is struggling with a complicated HomeKit integration process. Because it simplifies the entire process and ensures a smooth experience.
Say goodbye to complicated setups and enjoy easy integration with Apple HomeKit with a few steps. If you have a little bit of technical knowledge, this solution is perfect for you! AddtoHomeKit provides thousands of plugins and step-by-step guides allowing you to have the perfect Tuya HomeKit integration.
ATH Bridge
This incredible solution comes pre-flashed with a specially compiled server that effortlessly connects with Siri. This is designed with simplicity in mind and allows you to have amazing integrations.
If you're dreaming of a smarter home with a, hassle-free solution to integrate your non-HomeKit devices into HomeKit, look no further than the ATH HomeKit Homebridge Hub.
ATH Bridge
I would recommend this as the best hardware option for anyone looking for a reliable plug-and-play solution, as it makes the integration process seamless and hassle-free.
Matter Hardware (Easiest)
You can expose your existing Tuya Zigbee accessories to the Apple Home app using devices like the Zemismart M1 Matter Hub. It acts as a bridge.
Key Capabilities
- Matter Bridge: It translates your current "Powered by Tuya" Zigbee 3.0 sensors, switches, and lights so that they look native in the Apple Home app.
- Thread Border Router: It acts as a gateway for Thread-based devices (like the Zemismart Matter-over-Thread curtain motors), allowing them to communicate with your network.
- Wired Reliability: this device connects via Ethernet (RJ45), which provides a more stable connection for your smart home backbone.
- Device Capacity: It can manage up to 100 Zigbee sub-devices and 20 Thread devices simultaneously.
Setup with Apple HomeKit Setting up the M1 is a two-stage process because it requires the Tuya ecosystem to manage the "child" devices:
- Tuya/Smart Life App:
- Add the M1 Hub to the Smart Life app.
- Pair all your Zigbee sensors or Thread devices to it.
- Matter Sharing:
- In the hub's settings within the Smart Life app.
- Select "Share via Matter" to generate a setup code.
- Apple Home App:
- Open the Apple Home app, tap "Add Accessory,".
- Scan that generated code to bridge the entire hub and its connected devices into HomeKit.
HOOBS
HOOBS stands for Homebridge Out of the Box which consists of a Raspberry Pi and the Homebridge software pre-install.
Also, it can integrate thousands of third-party accessories with HomeKit and is compatible with over 2000 accessories now. This solution is very beneficial as it allows you to have direct Tuya HomeKit integration. So, you can create HOOBS SmartLife integration easily.
Homebridge
Simply, Homebridge is a lightweight server that is designed to unify your entire smart ecosystem under one simple control system.
This third-party software application can integrate with your home automation system to offer Apple Home integration for your smart home devices that don’t directly support Apple Home Kit Tuya.
If you want to install the Homebridge and add devices to HomeKit yourself, you can do it simply using our complete step guide to adding Tuya devices to Homekit →
Can You Add Tuya ZigBee Devices to HomeKit Using Zemismart Hub?
Yes, the Zemismart HomeKit Hub is one of the few options that can directly connect certain Tuya ZigBee devices to Apple HomeKit.
The Zemismart ZigBee hub supports Tuya-standard ZigBee devices such as:
- Smart curtains
- Lights
- Switches
- Sensors
Once connected, you can control these devices using:
- Apple Home app
- Siri voice commands
- Tuya Smart / Smart Life app
Now you know how to connect tuya to HomeKit. Let's see how to add Tuya ZigBee devices to HomeKit with Zemismart HomeKit Hub.
How Do You Add Tuya ZigBee Devices to HomeKit Using a Zemismart Hub?
Zemismart hubs let you connect Tuya ZigBee devices to Apple HomeKit.
Steps:
- Connect and power the hub (Ethernet)
- Open Tuya app → Add Device
- Add the hub to your account
- Put ZigBee device in pairing mode
- Tap Add Sub-Devices
Can Tuya Smart Switches Work with Apple HomeKit?
Yes, even if your Tuya smart switches don’t natively support HomeKit, you can still control them using the Apple Home app and Siri with the right setup.
How Do They Connect?
- Wi-Fi
- Bluetooth LE
Features of Tuya Smart HomeKit Solutions
- Remote control
- Siri voice control
- Scheduling & timers
- Automation
- Smart linkage
You can use AddtoHomeKit to add Shelly devices to Apple HomeKit and even add SwitchBot devices to HomeKit and create a ZigBee HomeKit with AddtoHomeKit!
What Can You Do with Tuya-HomeKit Integration?
- Control devices using Apple Home app and Siri.
- Create automations and scenes.
- Improve smart home security.
- Use Wi-Fi, Bluetooth, and ZigBee devices.
- Access devices remotely via cloud.
- Build custom setups without coding.
Supported devices include:
Tuya ZigBee hubs, switches, bulbs, lights, and thermostats
How to add Tuya Devices to Apple Homekit using Homebridge?
- Tuya User Account: Make sure you have a Tuya user account and that your devices are linked with the Tuya App. You can check the configuration on the Tuya IoT platform.
- Install Homebridge: If you haven't already, set up Homebridge on your Mac or PC. You can refer to our Homebridge setup guide for detailed instructions.
- Install Tuya Plugin: After installing Homebridge, you need to install the Tuya plugin.
To install the Tuya plugin using your terminal, run:
npm install homebridge-tuya-platformAlternatively, you can install the Tuya plugin using the Homebridge UI:
- Open Homebridge in your web browser using: http://homebridge
- Click on the plugin in the menu bar.
- Search for "Homebridge Tuya" in the search field.
- Edit the Configuration File: After installing the Tuya plugin, you need to edit the configuration file.
Navigate to the directory:
homebridge-tuya-platform/configEdit the config.json file to include your Tuya account details:
- Username and Password: Use the credentials from the Tuya Smart or Smart Life app.
- AccessId and AccessKey: Obtain these from your cloud project on the Tuya IoT platform.
- Lang: Keep the default value.
- Endpoint: Select the availability zone of your cloud project.
- ProjectType: Choose the development method you selected when creating your project.
- AppSchema: Specify the mobile app used to link your devices (Tuya Smart or Smart Life).
- CountryCode: Select the code for the country you used when logging into the Tuya app.
- Run the Plugin: Navigate to the homebridge-tuya-platform directory and run the plugin using:
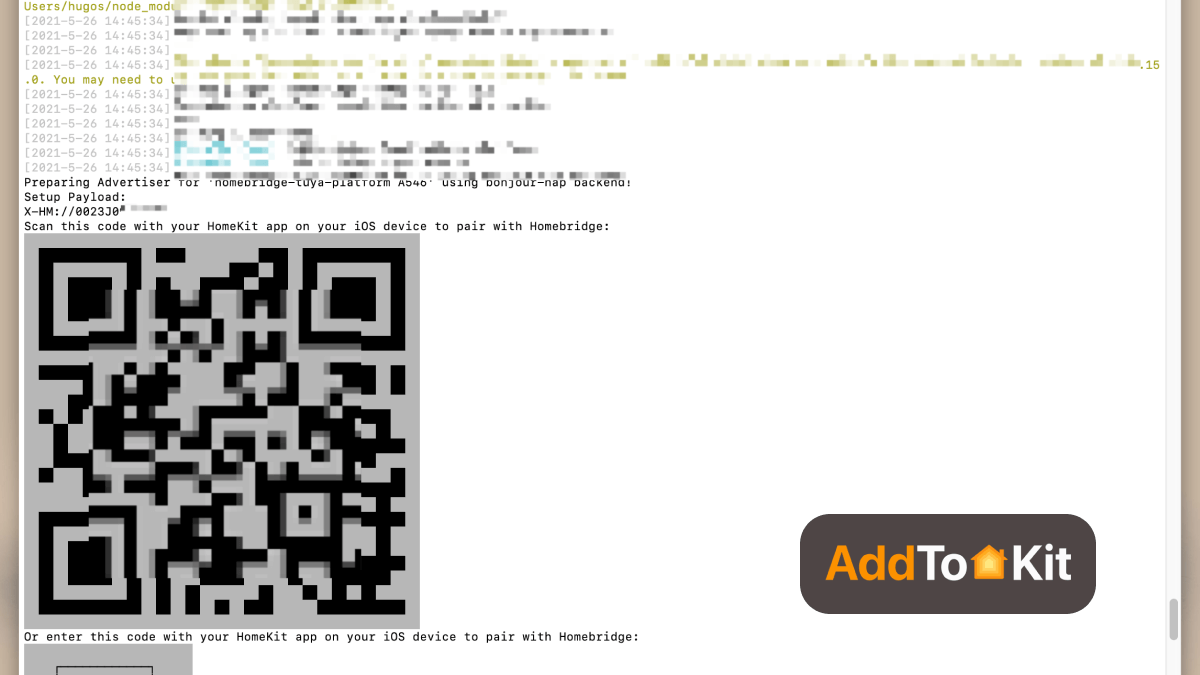
homebridge -D -U ./config/ -P ./ - Bridge to HomeKit: Open the Home app on your Apple device. Scan the QR code from the Homebridge UI to pair with Homebridge or enter the 8-digit PIN code found in the configuration file.
- Control Devices on HomeKit: After successful pairing, you can control your Tuya devices through the HomeKit dashboard.
Follow a more comprehensive Tuya HomeKit HomeBridge guide for best results.
You can also integrate eWeLink HomeKit, Somfy HomeKit, UniFi HomeKit using Homebridge.
How Do You Add Tuya Devices to Apple HomeKit Using HOOBS?
After all you need to link devices with your Tuya App. Let's see how to configure on Tuya IoT platform.
- Step 1: How Do You Set Up HOOBS?
- Plug the HOOBS hub into power
- Connect it to your router (Ethernet or Wi-Fi)
- Open the HOOBS interface in your browser
- Create your admin account
- Step 2: How Do You Install the Tuya Plugin in HOOBS?
- Log in to the HOOBS dashboard
- Go to the Plugins section
- Search for “Tuya LAN”
- Install homebridge-tuya-lan
- Step 3: How Do You Configure the Tuya Plugin?
- Open the installed plugin
- Copy the configuration code from the plugin page
- Paste it into the plugin settings
- Save the configuration
- Step 4: How Do You Add Tuya Devices to Apple Home?
- Open the Apple Home app
- Tap Add Accessory
- Choose “I don’t have a code”
- Enter the 8-digit HOOBS setup code (found in dashboard)
Can You Use Raspberry Pi Instead of HOOBS?
Yes, Raspberry Pi is a cheaper DIY alternative if you want to run Homebridge manually.
Quick Setup Overview
- Download and Flash to SD card
- Connect to Network
- Manage Homebridge
- Connect to HomeKit
- Install and configure the plugin
Why Use Raspberry Pi?
- Low-cost setup
- Full control over Homebridge
- Good for advanced users
Not only Tuya HomeKit, you can also integrate Aladdin Connect HomeKit using HOOBS.
How Do You Configure Tuya Devices Using the Tuya IoT Platform?
This method is for advanced users who want local control and better Homebridge integration.
What Do You Need Before Starting?
- Tuya Smart or Smart Life app
- Tuya account
- Tuya developer account (iot.tuya.com)
- How Do You Create a Tuya Cloud Project?
- Navigate to Cloud → Development → Create Cloud Project.
- Fill in the required details.
- Click Create to complete the setup.
- How Do You Link Your Tuya App Account?
- Go to Devices → Link Tuya App Account.
- Click Add App Account.
- Scan the QR code using the Tuya app.
- How Do You Get the Device ID?
- Go to the Devices section.
- Select your device.
- Copy the Device ID.
- Select the correct data center.
- How Do You Enable API Permissions?
- Go to Cloud → My Services.
- Enable IoT Core (trial plan).
- How Do You Extract the Tuya Local Key?
- Go to Cloud → API Explorer.
- Open Device Management.
- Enter your Device ID.
- Submit the request.
- How Do You Add This to Homebridge?
- Open Homebridge.
- Add your device.
- Paste the Device ID and Local Key.
- Save and restart Homebridge.
Go to the Tuya IoT Platform and set up your cloud project:
Connect your Tuya app to the cloud project:
Your app and cloud project are now linked.
Locate your device details:
Enable required services:
Use the API Explorer to get your Local Key:
You will now see your Local Key.
Complete the integration:
Your device will now appear in Apple Home.
- Go back to the Tuya IoT Platform page, and now go to the created cloud development project (Cloud, Development, Create Cloud Project).
- After then, you have to fill in the details and click Create button.
How Do You Connect a Tuya Matter Gateway to Apple HomeKit?
Using a Matter gateway is one of the newest ways to connect Tuya devices to Apple Home without relying fully on traditional bridges.
Step-by-Step Setup
- Press the set button on the gateway until the indicator light flashes
- Open the Tuya Smart / Smart Life app
- Go to Add Device → Find Matter Gateway
- Add the gateway and connect your sub-devices
- Tap Share via Gateway
- Generate the Matter QR code
- Open the Apple Home app
- Tap Add Accessory and scan the QR code
Troubleshooting Tips for Common Issues
- Ensure Tuya Devices are Set Up in the Tuya or Smart Life App
- Before integrating with HomeKit, make sure the Tuya devices are set up and working properly in the Tuya Smart or Smart Life app.
- Verify that the device is functioning normally in the Tuya app before attempting to add it to HomeKit.
- Check HomeKit Compatibility
- Verify that your Tuya devices support HomeKit integration. Not all Tuya devices are HomeKit-compatible. Ensure that the device supports this feature (check the box or product description for the HomeKit logo or mention).
- Ensure that the HomeKit pairing code (usually a QR code or 8-digit code) is available for the device.
- Verify HomeKit Setup Code
- When adding Tuya devices to HomeKit, ensure you're using the correct HomeKit setup code (either a QR code or a unique 8-digit code). This code is required to link your Tuya device to HomeKit.
- You can find this code in the Tuya app or printed on the device itself.
- Check Wi-Fi Network
- Ensure your iPhone/iPad and Tuya devices are connected to the same Wi-Fi network. It's important that both devices are on the same local network, typically on the 2.4 GHz band (as many smart devices don’t support 5 GHz).
- If your Wi-Fi network is split into different bands (e.g., 2.4 GHz and 5 GHz), ensure that both your phone and Tuya devices are connected to the 2.4 GHz network.
- Restart the Tuya Devices
- If the Tuya device is not showing up in HomeKit, try restarting it. Turn the device off and back on or reset it to factory settings.
- To reset the device, typically press and hold the reset button for about 5-10 seconds and follow the setup instructions again.
- Update Tuya App and Device Firmware
- Ensure that the Tuya Smart or Smart Life app is up-to-date. Check the App Store for any available updates.
- Check for any firmware updates for your Tuya devices within the Tuya or Smart Life app and update them if necessary.
- Re-add Tuya Device to HomeKit
- If the Tuya device was previously added to HomeKit but is not working anymore, you may need to remove it and add it back.
- In the Home app, find the device and remove it.
- Then, scan the HomeKit QR code again or enter the 8-digit setup code from the Tuya app.
- Reset HomeKit Pairing
- If the HomeKit setup process fails, try resetting the HomeKit pairing for your Tuya device:
- In the Home app, remove the device.
- Go to the Tuya app and reset the device and try pairing it again with HomeKit.
- Ensure HomeKit Hub is Working
- If you're controlling devices remotely (outside your home), make sure your HomeKit hub (Apple TV, HomePod, or iPad) is online and working.
- Your HomeKit hub should be up-to-date, powered on, and connected to the same Wi-Fi network as your Tuya devices.
- Check Router Settings
- Make sure your router settings do not block local network traffic, especially between devices and your HomeKit hub.
- Ensure your router is not blocking communication between Tuya devices and your phone or HomeKit hub.
- Reboot Your Router
- Sometimes, a router reboot can solve network issues that affect communication between Tuya devices and your phone. Try rebooting the router and then attempting the setup again.
- Disable VPN or Firewall
- If you’re using a VPN or firewall, it might block local network connections, causing issues with HomeKit integration.
- Disable your VPN temporarily and check if that resolves the issue. Similarly, check your router’s firewall settings.
- Check for Network Interference
- Smart devices can experience interference from other devices. Ensure that there’s no strong interference or excessive distance between the Tuya devices and the router.
- Consider using a Wi-Fi range extender if your devices are too far from your router.
- Update iOS and Home App
- Make sure your iPhone or iPad is running the latest version of iOS. An outdated iOS version may cause compatibility issues with HomeKit.
- Update the Home app and ensure your iOS system is up-to-date for proper HomeKit functionality.
- HomeKit Restrictions
- Ensure that there are no restrictions set on your device, such as parental controls or device management settings, that might block HomeKit functionality.
- Test with a Different Device
- If the Tuya device works on one iOS device but not another, try setting it up on a different device to rule out issues with your phone or tablet.
Conclusion
Tuya devices may not support Apple HomeKit natively, but that doesn’t mean you’re limited. With the right method whether it’s AddToHomeKit, ATH Bridge, Homebridge, or a Zemismart hub you can still bring your entire smart home into the Apple ecosystem.
FAQ
No, Tuya doesn’t support HomeKit natively. Tuya is a third-party manufacturer, making it difficult to get the “works with HomeKit” label due to Apple's guidelines.
Local Tuya allows you to handle Tuya devices without an internet connection. Home Assistant can manage Tuya devices locally through a custom integration.
No, Tuya is not compatible with Apple HomeKit. You can control Tuya devices using the Tuya Smart App on your iPhone or iPad.
You can add Tuya directly from Configurations -> Integrations -> Add Integration -> Tuya without needing a HOOBS hub or HomeBridge.
Tuya offers various networking hardware modules, including Wi-Fi, Bluetooth, and ZigBee, which can be integrated with HomeKit for smart home control.
Yes, Tuya Smart devices use both Wi-Fi and Zigbee, allowing for compatibility with ZigBee gateway hubs.
Yes, you can control Smart Life devices on HomeKit using open-source software and Homebridge.
Yes, both are official Tuya apps, but the Tuya Smart App uses the Tuya logo, while the Smart Life App does not.
You need a HOOBS hub or third-party software to connect Tuya Smart to HomeKit.
Yes, Tuya Smart is considered secure, adhering to data privacy regulations and providing a highly encrypted user interface.
You can add Tuya to Home Assistant by going to Configurations -> Integrations -> Add Integration -> Tuya.
Yes, you can control Smart Life products with your iPhone, iPad, or Mac.
To add a Tuya Smart Camera to HomeKit, download the AddtoHomeKit and follow the step-by-step guides.
Yes, you can integrate your Tuya switch with HomeKit using AddtoHomeKit, along with other Tuya devices.
Yes, Tuya's newest smart home devices support Matter.
Yes, except for the lock and remote platform, all Home Assistant platforms are supported by Tuya integration.
Tuya isn't compatible with ZigBee by default, but you can add ZigBee devices to HomeKit using AddtoHomeKit or other hubs.
Yes, the IKEA DIRIGERA Smart Hub is Matter-Ready and can connect IKEA devices to Tuya Home with a ZigBee Hub.
Yes, you can use HOOBS with Smart Life to create an integration easily.
No, most smart home devices do not work with HomeKit.