How to Add Any DoorBird Devices to Apple HomeKit

Ever thought of being able to see who’s at your door, control your intercom, and manage your home security – all from your iPhone, iPad, or Apple Watch? Sounds like a dream, right? With DoorBird HomeKit integration, this dream becomes a reality! Whether you already own a DoorBird device or are planning to get one, adding it to Apple HomeKit can seamlessly enhance your smart home experience.
In this guide, I’ll show you how to add DoorBird to HomeKit easily. Let’s dive in!
AddtoHomeKit – Editor's Pick
DoorBird AddToHomeKit is a third-party solution to add any smart home device to Apple HomeKit. It provides HomeKit configuration plugins and step-by-step guides to follow when adding DoorBird devices to HomeKit. It also provides you with a web solution and an app solution to integrate your DoorBird Apple Home integration. You need a little bit of technical knowledge, but I personally think most people could get by with AddtoHomeKit.
Why I Like AddtoHomeKit for DoorBird Home Kit Integrations?
- Very simple and requires little effort and time.
- User-friendly.
- Premium service.
- It has more than 200 devices enabling them to plug in.
- Offers seamless integration.
- However, it does lack a little bit of technical knowledge.
Read step guide for operate DoorBird devices with HomeKit integration using AddtoHomeKit.
What Can You Achieve with DoorBird Devices?
- Answer the Door Anywhere: See and talk to visitors directly from your Apple devices.
- Control with Siri: Use voice commands to manage your DoorBird device.
- Enhanced Security: Monitor your door with live video and motion detection from the Home app.
- Remote Access: Check and control your DoorBird device from anywhere using Apple’s secure ecosystem.
Other Methods to Add DoorBird to Apple Home
- HOOBS
- ATH Bridge [Affordable Solution]
- HomeBridge
HOOBS Solution
HOOBS or the HomeBridge Out of the Box solution is also another superb method to create an Apple Home and DoorBird Integration. HOOBS is an improved version of HomeBridge and includes a fully assembled Raspberry Pi. Another cool thing is that the Raspberry Pi comes with a copy of the HOOBS HomeBridge server pre-installed on a microSD card.
Pros and Cons
Pros
- Simple, intuitive dashboard for setting up integrations.
- Easy process for both beginners and advanced users.
- Supports a wide range of plugins for various devices, including Doorbird.
- Pre-configured hardware solution for plug-and-play use.
- Easily integrates multiple non-HomeKit devices with Apple HomeKit.
Cons
- HOOBS hardware is pricier than DIY solutions like Raspberry Pi setups.
- Less flexibility compared to platforms like Home Assistant.
- Some users face difficulties ensuring Crestron devices show up properly in the Home app.
- Needs careful configuration of plugins and network settings for optimal performance.
ATH Bridge - Affordable Solution
ATH Bridge is the most affordable method to connect DoorBird with Apple Home Kit. In simple words, the ATH Bridge is a plug and play solution that provides you Apple HomeKit DoorBird integration. It is a pre-flashed and compiled server that is designed to have perfect and simple integration.
Pros and Cons
Pros
- Pre-configured and simple to set up with little bit of technical knowledge.
- Small form factor, easy to place anywhere in your home.
- Supports devices from Nest, Ring, Lifx, TP-Link, Philips Hue, Sonos, etc.
- Pre-configured hardware solution for plug-and-play use.
- Convenient for those looking for a reliable integration.
Cons
- Less flexibility than platforms like Home Assistant.
- May not support as many niche devices as the DIY Homebridge setup.
Read step guide for HOOBS.
HomeBridge Solution
HomeBridge is a third-party software solution. It offers Apple Home integration for your smart home devices that don’t directly support Apple HomeKit for DoorBird devices. Also, this is a cost-effective solution.
Pros and Cons
Pros
- Free to use as it's open-source.
- Over 2,000 plugins for various smart devices.
- Allows tailoring smart home setups with different plugins.
- Actively maintained by a large community.
- Large user base offering support and advice.
Cons
- Requires some technical knowledge (command-line interface, system configurations).
- Requires user-provided hardware (e.g., Raspberry Pi, Mac, PC).
- Ongoing updates and troubleshooting are user responsibilities.
- Occasionally, some plugins or updates may cause system instability.
Read step guide for HomeBridge.
DoorBird D1101V Wi-Fi Intercom Door Station with PoE - Surface Mount
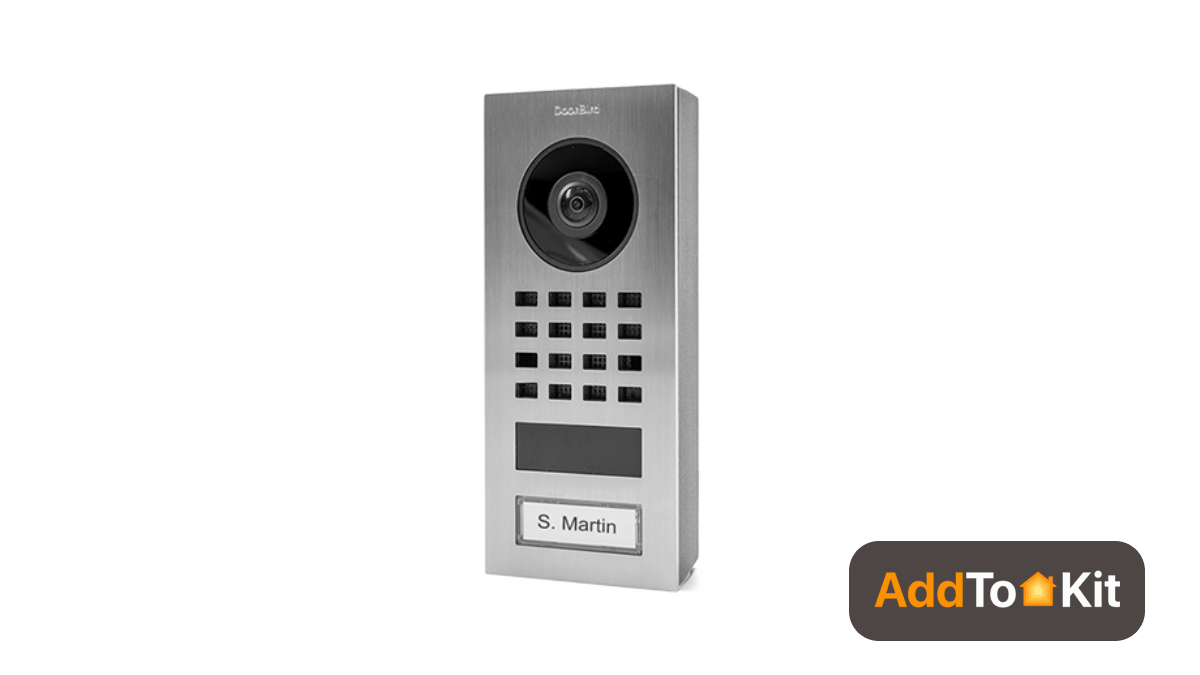
The DoorBird D1101v is a surface-mount Wi-Fi Intercom which allows you to answer your door or gate anywhere. The door bird door station can be easily retrofitted using PoE over Cat5 or Cat6 cable, making it ideal for modern homes and offices.
Features
- Full Stainless-Steel Enclosure
- HD 1080P Camera
- Two-way audio
- SIP Integration
- Bluetooth BLE
- Built in motion detection
- 1 x Integrated relay
- Night Vision
- Outdoor ready
- 15v DC PSU (included) or PoE
- ONVIF Compliant
Specification
| Finish | Brushed Stainless Steel |
| Features | 1 x Bistable relay (triggerable via DoorBird app) Terminal for REX |
| Wireless Features | 802.11 b/g/n 2.4Ghz |
| Power Input | 15VDC or POE 802.3af Mode A |
| Mounting | Flush Mount (Back-Box Included) |
| Day/Night IR Cut Filter | Yes (12 IR LEDs) |
| Lens | Wide-angle hemispheric lens, 180-degree horizontal view |
| Motion Detection | Active (configurable) |
| Networking Features | RJ45 Jack |
| Video Resolution | 1080P |
| Weather Rating | IP65 |
| Operating Temperature | -13° to 131°F |
| Dimensions (W x H x D) | 2.56" x 5.98" x 1.26" |
| Weight | 1.04 lbs |
Step-By-Step Guide to add DoorBird and HomeKit using AddToHomeKit
- Go to the AddtoHomeKit official website.
- Select the DoorBird ecosystem.
- Once you are directed to the next page, select your preferred solution.
- Now select the operating system.
- Install the HomeBridge Plugin.
- Tap on Add to HomeKit.
- Click on the Activation package to activate your account.
- Follow the instructions displayed on screen.
Well, not just DoorBird integrations, but it allows you to add Ring Camera to HomeKit and add Thinka devices to HomeKit as well!
Step-By-Step Guide to add DoorBird and HomeKit using HOOBS
- Install HOOBS on a Raspberry Pi or any other suitable hardware.
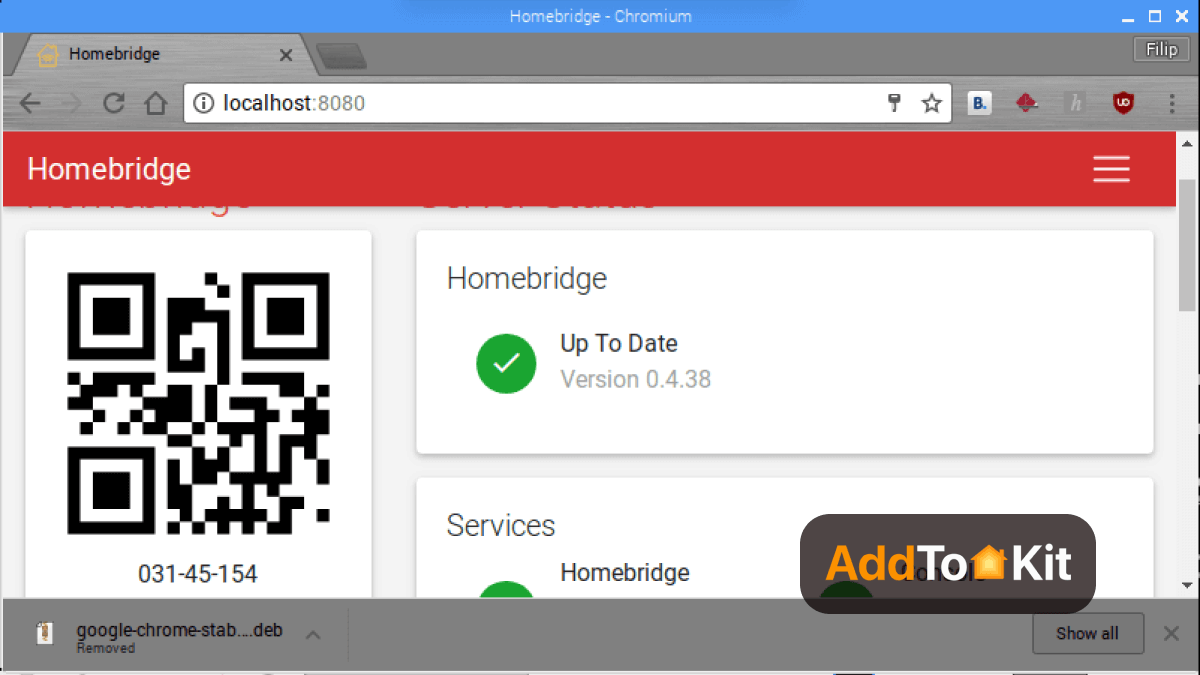
- Go to the HOOBS dashboard.
- Visit the Home App.
- Select "Add Accessory".
- Next, select the HOOBS server.
- Scan the QR code displayed on-screen.
- Finally, follow the instructions on-screen.
You can also add any devices to Apple HomeKit using HOOBS solution.
Step-By-Step Guide to connect DoorBird with HomeKit using HomeBridge
- Install HomeBridge on Mac / PC
- Edit the configuration file
- Run the DoorBird Plugin
- Control devices on HomeKit
Open the configuration file using your preferred text editor, such as nano:
nano ~/.homebridge/config.json
To use add DoorBird plugin to your HomeBridge config.json using the below command:
                    {
    "platform": "DoorBird",
    "devices": [
        {
            "name": "Front Door",
            "ip": "192.168.1.100",
            "username": "your_doorbird_username",
            "password": "your_doorbird_password",
            "doorbell": true,
            "relay": true
        }
    ]
}
If you want to more details about DoorBird HomeBridge Plugins, you can view Step-by-Step Guide to Add DoorBird Devices to HomeKit with HomeBridge article.
Troubleshooting HomeBridge
- Check Homebridge Plugin Compatibility:
- Ensure Correct Configuration:
- Check Network Connection:
- Reboot Devices:
- HomeKit Pairing Code:
- Update Software & Firmware:
- Check Homebridge Logs:
Make sure you're using the latest version of the Doorbird Homebridge plugin. Visit the plugin’s GitHub page for any updates or known issues with HomeKit integration.
Verify that your config.json file in Homebridge is correctly set up, including the proper IP address, Doorbird username, and password. Incorrect configuration can prevent the devices from showing up in HomeKit.
Ensure that both your Doorbird device and the Homebridge server are connected to the same network. A network issue (like different subnets or firewall settings) can interfere with the connection.
Try rebooting both the Doorbird and the Homebridge server. Sometimes, a simple reboot can resolve connection or syncing issues.
Ensure that you're using the correct HomeKit pairing code when setting up Doorbird with Homebridge. If the code is incorrect or expired, it will prevent the integration from working.
Ensure both Homebridge and your Doorbird firmware are up-to-date. Outdated software or firmware can cause compatibility issues, particularly after iOS or HomeKit updates.
Review the Homebridge logs for any errors related to the Doorbird integration. Logs can provide more specific details about what might be going wrong, like plugin errors or network timeouts.
DoorBird Alexa Integration
- Install the Alexa App: Ensure you have the Amazon Alexa app installed on your smartphone.
- Enable the DoorBird Skill: Open the Alexa app, go to "Skills & Games," and search for the DoorBird skill.
- Enable the skill and log in with your DoorBird credentials.
- Discover Devices: Ask Alexa to “Discover devices,” or manually add your DoorBird device via the Alexa app.
- Set Up Routines (Optional): Use Alexa routines to trigger other smart home devices, such as turning on lights when someone rings the DoorBird doorbell.
What You Can Do with DoorBird and Alexa
- See Who’s at the Door: View the live video feed on Alexa-enabled devices with screens, like the Echo Show or Fire TV.
- Voice Commands: Ask Alexa to show the door camera or control compatible smart devices linked to DoorBird.
- Automation: Create custom routines, such as playing a sound or turning on lights when someone rings the doorbell.
DoorBird Google Home Integration
To integrate your DoorBird with Google Home, you'll need to follow these simple steps:
- Connect Your DoorBird to Your Wi-Fi Network
- Add Your DoorBird to the Google Home App
- Link Your DoorBird to Google Assistant
- Start Using Your DoorBird with Google Assistant
Make sure your DoorBird intercom system is connected to your Wi-Fi network. Follow the manufacturer's instructions to connect it to your network.
Open the app and tap the "Add" button at the top of the screen. Next, select "Set up device.
Open the Google Assistant app and tap the icon in the top right corner to access your account settings. Next, select "Home Control" from the list of options, then tap the "+" button to add a new device.
Now that your DoorBird is linked to Google Home and Google Assistant, you can start using it with voice commands.
Editor’s Pick
When comparing these four methods, my personal pick goes to AddToHomeKit. It is a great fit for people who lead busy lives because it takes very little time and effort. I can use AddtoHomeKit on my desktop, saving me from downloading huge apps or documents. But you must think about what best fits you and your unique demands. I hope this information was helpful to you in determining what the choice was.
FAQs
Yes, DoorBird can work without an internet connection, but its functionality will be limited.
Yes, you can connect DoorBird to Alexa and enhance your smart home experience.
Each DoorBird Video Door Station comes with free recording storage (history) for the most recent 50 visitors and motion events.
There are QR codes in the "Digital Passport" document, which are valid until the user data is changed in the DoorBird application administration.
You can do this in the administration of the DoorBird App with the "Check for firmware update" function.