How to Add Any Thinka Smart Devices to Apple HomeKit

Thinka devices are great. While Thinka is not the most popular smart brand out there, I have to say that it is quite great. Most of the devices are HomeKit incompatible which is why I looked for methods to add Thinka devices to HomeKit. I am happy to announce that I have found a few promising methods to create a Thinka HomeKit.
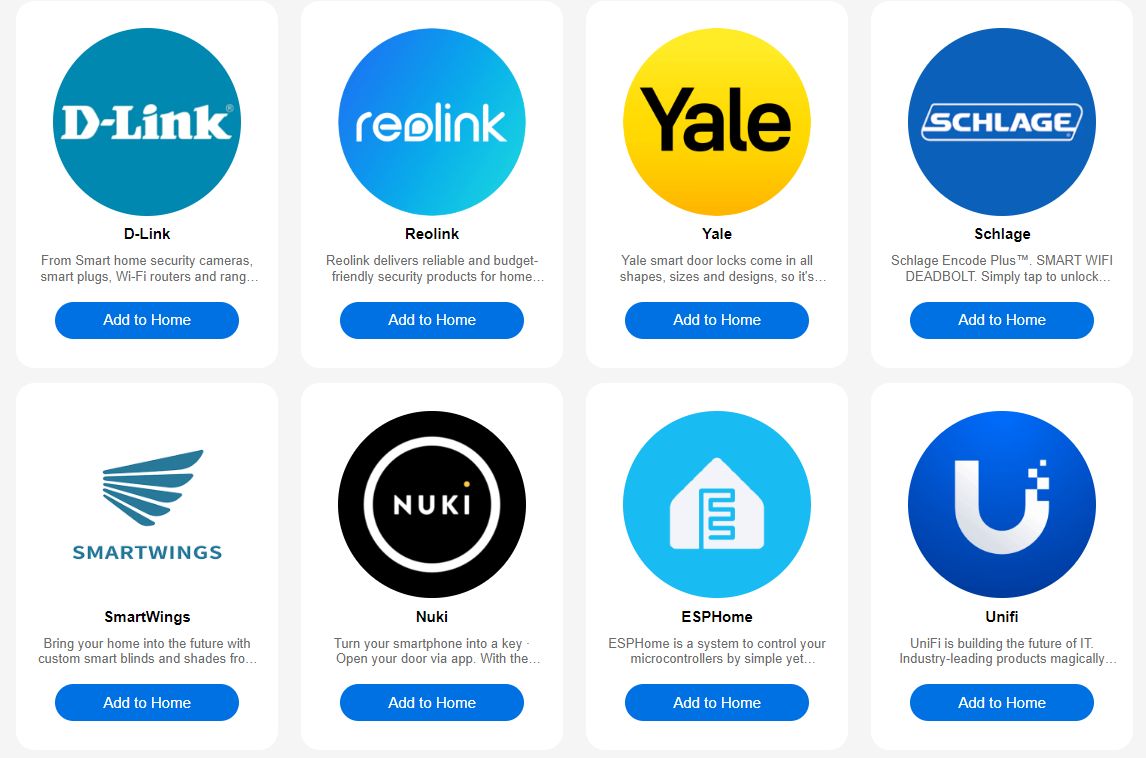
- AddtoHomeKit [Most Recommended Solution]
- ATH Bridge [Most Recommended Device Solution]
- HOOBS
- HomeBridge
AddtoHomeKit [Recommended Solution]
AddToHomeKit is an amazing solution to control Thinka with the Apple Home app. To give you a basic explanation, AddtoHomeKit is a web solution, a software solution that provides thousands of plugins and step guides to add devices to HomeKit. Honestly one of the best things I have tried so far. The user interface is amazing and you can find any plugin for almost any brand out there!
Why I Prefer AddtoHomeKit Over Other Solutions
- Easy and clear instructions.
- Lifetime services.
- Plugins and step-guides for almost all brands are available.
- There is no need to download any bulky apps.
- Updates and adds new brands weekly.
- However, it does require a bit of technical knowledge.
I used AddtoHomeKit to add Alexa to HomeKit a few years back and it still works like a charm!
How to Add Thinka to HomeKit with AddtoHomeKit
- Go to the AddtoHomeKit official website.
- Select the Thinka ecosystem.
- You will be redirected to the next page, select your preferred solution.
- Afterwards, you must select the Operating System.
- Install the HomeBridge Plugin
- Tap on the AddtoHomeKit
- Follow the instructions provided and enjoy!
Thinka Hub for Z-Wave
Now the Thinka Z-Wave Hub is honestly one of the best Z-Wave Hubs for HomeKit. While I have not experienced the Z-Wave Hub myself, I have seen some good reviews on it in the Thinka HomeKit Reddit thread.
According to Redditors, the hub is a bit overpriced. However, the hub works great, and it is also Apple HomeKit compatible. As long as the devices fall into a supported category, the Thinka Z-Wave hub is the first Z-Wave-certified hub to formally expose all Z-Wave devices to HomeKit. Any Z-Wave product from any brand can work with this hub and appear in HomeKit, unlike many Zigbee hubs that exclusively expose their own-brand devices to HomeKit. Basically, you can add any Z-Wave Device to Apple HomeKit with this hub.
Using Thinka Hub to Integrate Z-Wave Devices with Apple HomeKit
You must carefully follow a few key steps in order to complete the Z-Wave Thinka HomeKit integration. It is a simple procedure that takes only a few minutes to complete.
Signing up for Thinka ZWave
This is the process's initial stage. Connect the Thinka Z-Wave hub to a power source to turn it on. Next, use the included Ethernet wire to connect it to the internet.
- Register the hub by visiting https://setup.thinka.eu/from a web browser.
- Click the Lookup Thinka button after entering the Thinka Z-Wave hub's serial number.
- To finish the registration procedure, adhere to the guidelines provided.
- After that, finish the registration procedure by following the instructions.
There is another hub that you can use, Thinka KNX Hub Pro and the Thinka KNX Hub;
Thinka KNX Hub Pro vs Thinka KNX Hub
Both the Thinka KNX Hub and Thinka KNX Hub Pro are designed to bridge KNX devices with popular smart home ecosystems. The main difference lies in the added functionalities and advanced processing power of the Hub Pro making it suitable for larger KNX installations and more demanding setups.
Key Features of Thinka KNX Hub
- Seamlessly integrate KNX devices with Apple HomeKit.
- Direct control of lights, thermostats, blinds and sensors using the Home app or Siri voice commands.
- Ensures high-level security with local processing and no cloud dependency.
Key Features of Thinka KNX Hub Pro
- All features of the Thinka KNX Hub Pro has enhanced processing power.
- Supports larger KNX systems making it ideal for commercial buildings or homes with complex automation.
- Faster response time for controlling devices and updating states in HomeKit.
Steps to Add Thinka KNX Hub to Apple HomeKit
- Set up Thinka Hub:
- Ensure your KNX devices are wired and configured correctly using (ETS) (Engineering Tool Software).
- Connect the Thinka Hub to your network via Ethernet.
- Power up the Thinka Hub and wait for the status LED to indicate a stable connection.
- Access the Thinka Web Interface:
- Open a web browser and go to the Thinka Hub’s IP address.
- Complete the setup process ensuring all your KNX devices are detected and listed in the Thinka interface.
- Enable HomeKit Integration:
- Go to the HomeKit tab in the Thinka Interface.
- Tap on Pair with HomeKit to generate a unique HomeKit pairing code.
- Add Thinka to the Home app:
- Open the Apple Home app on your iPhone or iPad.
- Tap the + > Add Accessory and scan the pairing code displayed by the Thinka Hub.
- Follow the prompts to complete the pairig process.
- Once paired, your KNX devices will appear in the Home app and you can organize them into rooms.
- Control Devices with Siri.
- "Hey Siri, turn off the kitchen lights."
- "Hey Siri, close the living room blinds."
You can now use Siri voice commands to control your KNX devices such as:
Why Use Thinka KNX Hub for HomeKit Integration
- Native HomeKit Support - Unlike many bridges, Thinka offers official HomeKit certification ensuring smooth and reliable integration.
- Local Processing - All commands are processed locally providing faster response times and better privacy.
- Broad Device Compatibility - Thinka supports a wide range of KNX certified devices including lights, HVAC systems, shutters and sensors.
Alternative Methods to Add Thinka to Apple HomeKit
ATH Bridge
The ATH Bridge is, in my opinion, the best reasonably priced option available for ensuring smooth integration between smart home appliances and any ecosystem of choice. A specially developed server called ATH Bridge is pre-flashed and made to make connecting Thinka to Apple HomeKit simple. It is also incredibly simple to use and set up.
Pros and Cons
Pros
- Pre-configured and simple to set up with no technical expertise needed.
- Small form factor, easy to place anywhere in your home.
- Supports devices from Nest, Ring, Lifx, TP-Link, Philips Hue, Sonos, etc.
- Pre-configured hardware solution for plug-and-play use.
- Convenient for those looking for a simple, reliable integration.
Cons
- Less flexibility than platforms like Home Assistant.
- May not support as many niche devices as the DIY Homebridge setup.
HOOBS
The HomeBridge Out of the Box solution, or HOOBS, is yet another fantastic way to integrate a Thinka HomeKit. Not only does it integrate with Thinka, but it also lets you add Geeni camera to HomeKit! A completely assembled Raspberry Pi and pre-built images are just two of the incredible features that HOOBS, an enhanced version of HomeBridge, offers. The fact that a copy of the HOOBS HomeBridge server is pre-installed on a microSD card for the Raspberry Pi is another amazing update.
Pros and Cons
Pros
- Simple, intuitive dashboard for setting up integrations.
- Easy process for both beginners and advanced users.
- Supports a wide range of plugins for various devices, including Thinka.
- Pre-configured hardware solution for plug-and-play use.
- No need for advanced technical knowledge.
- Easily integrates multiple non-HomeKit devices with Apple HomeKit.
- Most users (and in my opinion) report stable, consistent performance once set up.
Cons
- HOOBS hardware is pricier than DIY solutions like Raspberry Pi setups.
- Less flexibility compared to platforms like Home Assistant.
- Some users face difficulties ensuring Crestron devices show up properly in the Home app.
- Needs careful configuration of plugins and network settings for optimal performance.
Steps to Add Thinka to HomeKit with HOOBS.
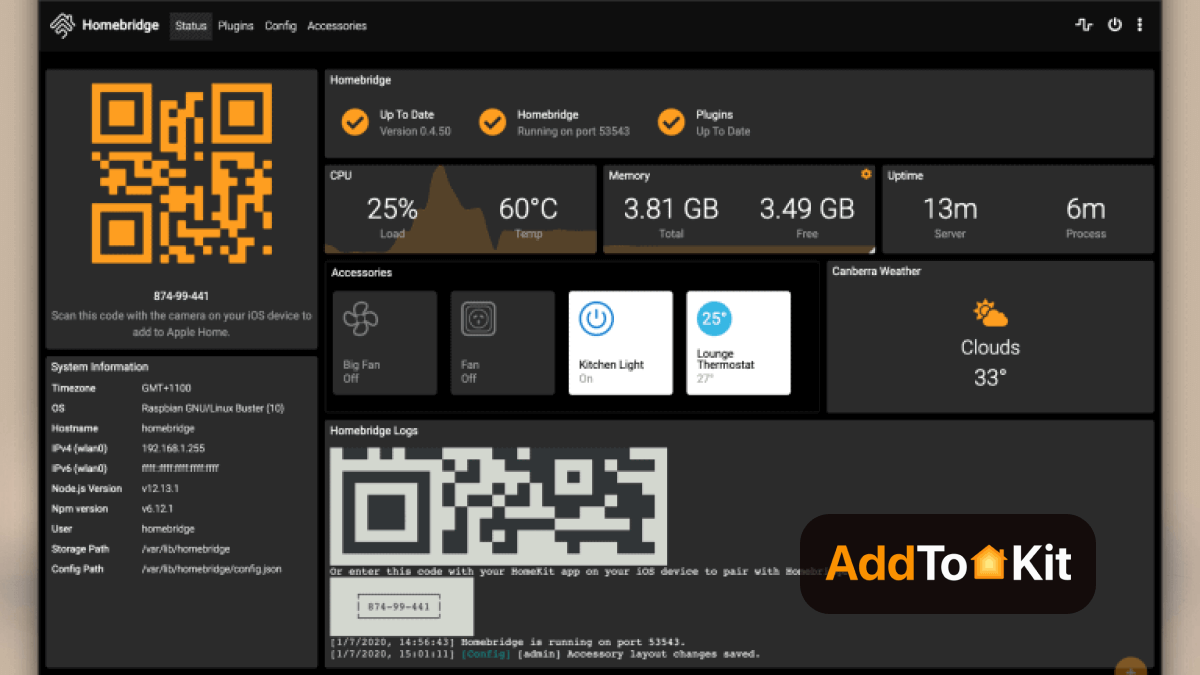
HomeBridge
In short, HomeBridge is a NodeJS server that mimics the iOS HomeKit API and is lightweight. A vast array of plugins is supported by this open-source program. The only drawback is that this requires some advanced coding knowledge.
Pros and Cons
Pros
- Free to use as it's open-source.
- Over 2,000 plugins for various smart devices.
- Allows tailoring smart home setups with different plugins.
- Actively maintained by a large community.
- Large user base offering support and advice.
Cons
- Requires some technical knowledge (command-line interface, system configurations).
- Requires user-provided hardware (e.g., Raspberry Pi, Mac, PC).
- Ongoing updates and troubleshooting are user responsibilities.
- Occasionally, some plugins or updates may cause system instability.
Steps to for Thinka HomeKit with HomeBridge.
Step Guides to Add Thinka to HomeKit
Add Thinka to HomeKit with HOOBS
- Prepare your Network:
- Visit the HOOBS Website:
- Boot up HOOBS:
- Access HOOBS Dashboard:
- Access HOOBS Configuration:
- Install Thinka Plugin:
- Configure the Thinka Plugin:
Make sure you have a stable Wi-Fi network available, both your iOS device and HOOBS to the same Wi-Fi network.
You must flash the HOOBS image onto a microSD card using appropriate software (eg: BalenaEtcher or Raspberry Pi Image). Now, insert the microSD into the Raspberry Pi. Acquire and install HOOBS.
After the installation of HOOBS, connect your Raspberry Pi to power and wait for HOOBS to boot up. HOOBS will appear as a Wi-Fi network, namely "hoobs.local", connect your device to this network.
Visit http://hoobs.local and follow the on-screen instructions to complete the initial setup of HOOBS. You would most likely need to set up your admin account and connect HOOBS to your Wi-Fi network.
After completing the setup, you will be directed to the HOOBS dashboard where you can manage plugins and configure devices.
In the HOOBS dashboard, click on “Plugins” in the sidebar. Search for “Thinka” in the Plugins Marketplace. Click “Install”.
Add Thinka Devices to HomeKit.
Add Thinka to HomeKit with HomeBridge
- Install HomeBridge:
- Add the Xiaomi Plugin:
- Obtain Device Token:
- Configure Plugin:
- Restart HomeBridge:
- Pair with HomeKit
Set up HomeBridge on a compatible device like a Raspberry Pi, or your computer.
Use the HomeBridge UI or terminal to install the Xiaomi plugin homebridge-miot or similar. A plugin that is specific to your devices.
Retrieve your Thinka device token using tools like the Mi Home App or third-party scripts.
Edit the HomeBridge configuration file config.json with the device token, IP address and plugin settings.
Restart HomeBridge to load the Thinka Plugin.
Open the Home app, scan the HomeBridge QR code, and enjoy Thinka devices in HomeKit.
You can follow a more comprehensive Thinka HomeKit HomeBridge step guide.
General Troubleshooting for Thinka HomeKit
- Ensure Proper Setup of Thinka Device:
- Reboot the Thinka Device and Router:
- Check HomeKit Pairing Code:
- Ensure Correct Network Settings:
- Update Thinka Device Firmware:
- Reset the Thinka Device:
- Review Homebridge Logs (if applicable):
- Check for Interference from Other Devices:
- Contact Thinka Support:
Double-check that the Thinka HomeKit device is properly set up. Make sure it’s plugged in, powered on, and connected to your Wi-Fi network correctly.
Power cycle the Thinka device and Wi-Fi router. This can often resolve connection issues and help re-establish a stable network link.
Verify that you are using the correct HomeKit pairing code when adding the Thinka device to the Home app. If the pairing code has expired or is incorrect, the device won't be added properly.
Make sure that your Thinka device and iPhone/iPad are on the same Wi-Fi network (same SSID) and that there are no restrictions (like a guest network or firewall) blocking communication between devices.
Check if your Thinka device has a firmware update available. Outdated firmware could cause compatibility issues, particularly with newer iOS updates or HomeKit versions.
If the device is still not connecting or showing up in HomeKit, try performing a factory reset on the Thinka device. This can clear any configuration issues that may have occurred.
If you're using Homebridge with Thinka, check the Homebridge logs for any errors related to the Thinka device. Logs might indicate issues such as authentication problems or configuration errors.
Make sure there is no interference from other smart home devices or network traffic that may be disrupting the Thinka device's connection. Try disconnecting other devices temporarily to test.
If all else fails, contact Thinka's support team for further assistance. They may be able to offer advanced troubleshooting steps or indicate whether there’s a known issue with the product.
Not only Thinka devices, you can also integrate DoorBird HomeKit using HomeBridge solution.
Thinka Google Home
I have not personally connected my Thinka devices to Google Home however, I have experienced the process with my friend. Accordingly, you can easily control your Thinka devices to Google Assistant by following the below steps.
How to Connect Thinka to Google Home
- Set up Thinka:
- Open Google Home App:
- Add a New Device:
- Tap + icon in the top-left corner.
- Select Set up device and then tap Works with Google.
- Find and link Thinka:
- Search for Thinka in the list of compatible services.
- Select Thinka and you will be prompted to log in with your Thinka account credentials.
- Authorize and sync devices:
- Once logged in, authorize Google to access your Thinka account.
- Your connected smart home devices will now be synced and appear in the Google Home app.
- Assign devices to rooms for better control.
- Test with Google Assistant:
- "Hey Google, turn on the living room lights."
- "Hey Google, set the thermostat to 72 degrees."
Ensure your Thinka Bridge is properly installed and connected to your smart home devices (ZigBee or Z-Wave). Make sure the devices are working within the Thinka app.
On your phone, open the Google Home app and ensure you are signed in with the correct Google account.
You can now control your devices with Google commands like:
So yes, that is all I know about Thinka HomeKit, I will update the article with more details when available!
Conclusion and Editor's Pick
In conclusion, you have a hardware product to add Thinka to HomeKit, but I would definitely go with the AddtoHomeKit solution. AddtoHomeKit is honestly one of the best solutions out there to add any device to HomeKit and it is easy and requires so little time! That being said, I urge you to go with a solution that would fit your standards and budget!
FAQs
Think supports a wide range of KNX devices including lights, thermostats, blinds and motion sensors. Once integrated these devices can be controlled via the Apple Home app or Siri voice commands.
No additional hardware is required. Thinka acts as the bridge between your KNX devices and Apple HomeKit making the process simple and efficient.
Yes, most KNX certified devices can be connected to Thinka and controlled through HomeKit. You can customize and manage them seamlessly in the Home app.
Absolutely. Thinka is HomeKit certified ensuing the pairing process is encrypted and highly secure. It uses a unique HomeKit code to link your hub and devices safely.
To integrate Thinka with HomeKit, you will need the Thinka KNX Hub, a stable network connection, a configured KNX system and an iPhone or iPad running the Apple Home app.