How to Add Any Geeni Device to Apple HomeKit
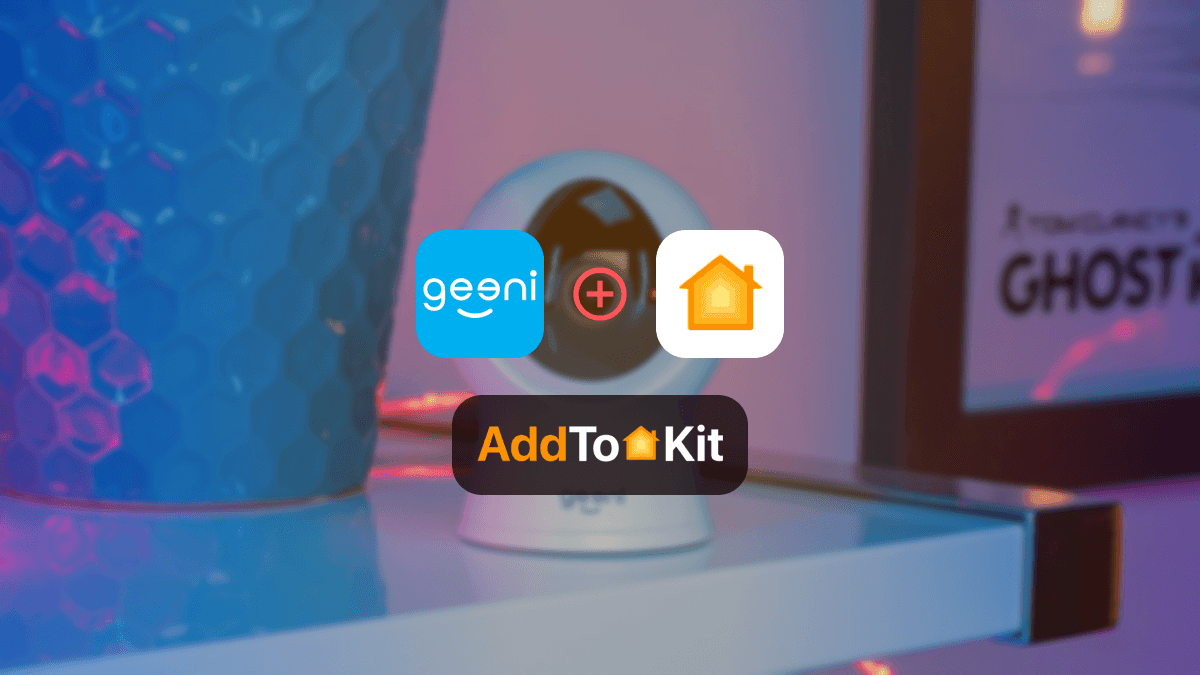

Geeni is disappointing, no I am being serious Geeni is amazing in so many ways, but it is not complete with Apple HomeKit! I love my Geeni devices, Geeni offers a broad range of smart devices from bulbs to cameras, and it is even cost-effective. Despite all this, their devices are HomeKit incompatible. However, I have found some of the best ways to create a Geeni HomeKit and let me list it out for you;
Geeni devices do not natively support Apple HomeKit. They are built on the Tuya IoT platform and designed for Alexa and Google Assistant only. However, you can connect any Geeni device to the Apple Home app using a third-party bridge. The four methods that work are AddToHomeKit, ATH Bridge, HOOBS, and Homebridge. If you want the fastest setup with no technical knowledge required, ATH Bridge is the recommended path.
- AddtoHomeKit [My Personal Favourite]
- ATH Bridge [Recommended Device Solution]
- HOOBS
- HomeBridge
AddtoHomeKit
AddtoHomeKit is one of the best software solutions out there. It allows you to add Geeni Devices to Apple HomeKit! It provides a huge range of plugins for many ecosystems. I would highly recommend using AddtoHomeKit.
I love AddtoHomeKit due to it is simple and fast process. It requires little to no time and effort to create amazing integration like the Geeni Camera HomeKit.
AddtoHomeKit is amazing, not only do they provide step-by-step guides and plugins, but they also provide the best solution we can use, if there are any hubs for a specific integration, they let you know that too! I would say, this is what a real customer-based product looks like! You do need a little bit of technical knowledge, however, if you request their package with installation support you will be able to work with some amazing people!
AddtoHomeKit Step-by-Step Guide
Why Geeni Devices Lack Native HomeKit Support
Geeni devices are designed to work seamlessly with Alexa, Google Assistant and IFTTT. However, they do not natively support Apple HomeKit due to the stringent requirements and certification costs associated with Apple’s ecosystem. Fortunately, with AddtoHomeKit and the alternatives to create a Geeni HomeKit, you can bridge the gap and control Geeni devices with the Apple Home app.
Alternatives to Add Geeni to HomeKit
ATH Bridge
The ATH Bridge (formerly known as the Athom Bridge) is a ready-made solution for integrating Geeni with Apple HomeKit. With the ATH Bridge you can add any device to HomeKit.
Why Use the ATH Bridge
- No technical expertise is required compared to HomeBridge.
- Pre-installed plugin simplifies the process.
- Compatible with a wide range of devices beyond Geeni.
HOOBS
HOOBS (HomeBridge Out of the Box) offers a user-friendly alternative to traditional HomeBridge setups. It simplifies the process for users who prefer minimal configuration effort. It is not limited to one ecosystem; you can even add UniFi to HomeKit with HOOBS.
Pros and Cons
Pros
- Pre-configured, making setup easier than HomeBridge.
- Includes an intuitive user interface.
Cons
- Limited advanced customization compared to HomeBridge.
HomeBridge
HomeBridge serves as an open-source platform that enables non-HomeKit devices to work with Apple HomeKit. This method requires technical knowledge, but if you are a very tech-y person, this would be the perfect solution for you. You can even create a Leviot HomeKit!
Add Geeni to HomeKit with HomeBridge
Pros
- Flexible and supports a wide range of devices.
- Free to use with minimal hardware requirements.
Cons
- Requires some technical knowledge.
Home Assistant
If you're looking for a powerful and highly customizable smart home platform, Home Assistant is an excellent solution. This open-source home automation hub can bridge your Geeni devices to Apple HomeKit with extensive flexibility and control.
How to Set It Up
- Install Home Assistant on a dedicated device, such as a Raspberry Pi, mini PC, or always-on server.
- Add your Geeni devices using the built-in Tuya integration, which allows Home Assistant to communicate with Geeni products.
- Enable the HomeKit Bridge integration within Home Assistant.
- Pair the HomeKit Bridge with the Apple Home app using the provided QR code.
Once configured, your connected Geeni devices will appear in the Apple Home app as HomeKit-compatible accessories, allowing you to control them with Siri, automations, and HomeKit scenes.
Use Siri Shortcuts (No Additional Hardware Required)
If you prefer a simpler approach and don't want to run a Home Assistant server or bridge, you can control certain Geeni actions using Apple's Siri Shortcuts.
How to Set It Up
- Open the Geeni app and create a Tap-to-Run automation or scene (for example, "Turn Off Bedroom Light").
- Open the scene settings and look for the Add to Siri option.
- Record a custom voice phrase for the action.
- Use the phrase with Siri to trigger the automation whenever needed.
Important Limitation
While Siri Shortcuts allow voice control of specific Geeni actions, they do not provide full HomeKit integration. Your devices will not appear as controllable accessories within the Apple Home app, and you will not have access to HomeKit features such as device tiles, sliders, room assignments, or Home automations.
Step Guides to Operate Solutions
Add Geeni to HomeKit with AddtoHomeKit
- Visit the AddtoHomeKit Website.
- Select the Geeni Ecosystem.
- Choose your Preferred Solution
- Select the Operating System
- Install the HomeBridge Plugin
- Click on AddtoHomeKit
- Follow the instructions
- Enjoy your Integration
Choose the Geeni ecosystem from the available options on the website.
You will be redirected to a new page. On this page, select the solution that best suits your needs.
Once you've chosen your solution, you'll need to select the operating system that you're using (e.g., Windows, macOS, Linux).
Follow the instructions to install the HomeBridge plugin on your device.
After installing the plugin, click on the AddtoHomeKit option.
Complete the setup by following the detailed instructions provided.
Once the setup is complete, you can start using your devices with HomeKit!
Add Geeni to HomeKit with HOOBS
- Setup HOOBS
- Install Plugins
- Configure Plugins
- Sync with HomeKit
Install HOOBS on a compatible device like a Raspberry Pi or a PC. Follow the setup instructions provided with HOOBS.
Access the HOOBS dashboard and search for plugins compatible with Geeni Cameras. Install the relevant plugins to enable communication between HOOBS and your Geeni Cameras.
Enter your Geeni devices’ details into the HOOBS configuration.This will enable HOOBS to recognize and integrate your devices into HomeKit.
Once configured, HOOBS will sync your Geeni devices with HomeKit. You can now control your devices using the Home app and Siri.
You can also integrate LIFX HomeKit using HOOBS Solution.
Add Geeni to HomeKit with HomeBridge
- Install HomeBridge
- Add Geeni HomeBridge Plugins
- Configure the Geeni HomeBridge Plugins
- Integrate with HomeKit
Set up HomeBridge on a compatible device. this could be a Raspberry Pi, a dedicated server, or through a Docker container.
Find and install the necessary HomeBridge plugins for Geeni Devices. These plugins are available from the Homebridge repository or community sources.
Edit the HomeBridge configuration file to include your Geeni Devices. You'll need to input device specific details to enable proper communication.
After configuration, HomeBridge will integrate your Geeni devices into HomeKit. You can manage and control them via the Home app and Siri.
How to add any Geeni Devices to HomeKit with HomeBridge.
Does Geeni support Matter?
As of mid-2026, Geeni has not introduced any Matter-compatible devices. Matter is the smart home interoperability standard backed by Apple, Google, Amazon, and others, and it would allow native HomeKit support without any bridge. Given Geeni's pace of product development, a Matter line is possible in the future, but there is no confirmed timeline. Until then, the bridge methods in this guide remain the only way to connect Geeni to HomeKit.
Geeni Google Home Integration
If you are a Google Home user, integrating Geeni devices is a breeze. Geeni devices natively support Google Home, allowing voice control and automation via Google Home.
How to Do So
- Set up your Geeni devices using the Geeni app.
- Open the Google Home app and add Geeni as a linked service.
- Sign in to your Geeni account to sync devices.
Comparison between Geeni App, HomeKit and Google Home
| Feature | Geeni App | Apple HomeKit | Gooogle Home |
|---|---|---|---|
| Native Compatibility | Yes | No (requires a bridge) | Yes |
| Voice Assistant | Alexa, Google Assistant | Siri | Google Assistant |
| Automation | Limited | Advanced | Moderate |
| Ecosystem Support | Geeni devices only | All HomeKit devices | All Google compatible devices |
| Security | Standard | High | Moderate |
| Ease of Setup | Very easy | Moderate | Easy |
Troubleshooting Tips
- Geeni devices are not natively compatible with HomeKit.
- Use a third-party bridge or plugin like Homebridge or HOOBS to integrate Geeni devices with HomeKit.
- Install the homebridge-geni or homebridge-geeni plugin to enable HomeKit support.
- The Geeni plugin for Homebridge is not functioning correctly.
- Ensure the plugin is installed correctly:
- Update the plugin to the latest version:
- Check the plugin’s configuration in the Homebridge config.json file. Example:
- Restart Homebridge after making changes.
- The plugin cannot log in to your Geeni account.
- Verify your Geeni email and password are correct.
- Ensure your Geeni account is active and not locked.
- If you’re using two-factor authentication (2FA), disable it temporarily for the plugin to work.
- Geeni devices are not showing up in the Home app.
- Check the Homebridge logs for errors:
- Ensure the plugin is correctly configured and your Geeni devices are online in the Geeni app.
- Restart Homebridge and refresh the Home app.
- Geeni devices are not communicating with Homebridge or HomeKit.
- Ensure your Geeni devices and Homebridge server are on the same Wi-Fi network.
- Check for IP conflicts or network restrictions (e.g., firewalls, VLANs).
- Restart your router and devices.
- Geeni devices frequently go offline or become unresponsive in HomeKit.
- Ensure your Wi-Fi signal is strong and stable.
- Reduce interference by placing your router and devices closer together.
- Update your Geeni devices’ firmware via the Geeni app.
- Homebridge is not pairing with HomeKit.
- Remove the Homebridge bridge from the Home app and re-add it.
- Scan the Homebridge QR code again from the Homebridge UI.
- Ensure your iOS device is on the same network as Homebridge.
- The Geeni plugin is throwing errors in the Homebridge logs.
- Check the plugin’s GitHub repository for known issues or updates.
- Enable debug mode in the plugin configuration to get more detailed logs:
- Share the logs with the plugin developer if the issue persists.
- The Geeni app is not working, affecting Homebridge integration.
- Geeni devices stop working after a firmware update.
Solution
Solution
npm install -g homebridge-geeni npm update -g homebridge-geeni {
"platform": "Geeni",
"name": "Geeni",
"username": "your-geeni-email",
"password": "your-geeni-password"
}Solution
Solution
journalctl -u homebridge -f Solution
Solution
Solution
Solution
{
    "platform": "Geeni",
    "name": "Geeni",
    "username": "your-geeni-email",
    "password": "your-geeni-password",
    "debug": true
} Editor's Pick
I would most definitely go for AddtoHomeKit. It is so easy and amazing, one of the most user-centric third-party solutions I have seen out there. Sure, it requires a bit of technical skills, but it is very nice and easy to operate it.
FAQs about Geeni Homekit
Not yet, but Geeni is working on expanding its Matter-certified product lineup. To check if your Geeni device supports Matter, look for the Matter logo on the packaging or visit Geeni’s official website for a compatibility list.
Yes, once Geeni devices are integrated through AddtoHomeKit, Siri becomes a fully functional assistant for your devices. You can issue commands like “Hey Siri, turn on the Geeni bulb” or include Geeni devices in scenes such as “Good Morning” for automation.
No, Geeni devices cannot directly connect to Google Home without a hub. Simply link your Geeni account to the Google Home app, and you will have immediate control of your devices without any additional hardware.
Yes, Geeni devices can simultaneously work with Alexa and HomeKit when integrated using HomeBridge, HOOBS or Matter. This multi-platform compatibility allows you to use both Siri and Alexa for voice control, depending on your preferences.
No, Geeni cameras do not support HomeKit Secure Video, even after integration. While you can view camera feeds in the Apple Home app, HomeKit Secure Video’s advanced.