How to Add Honeywell to Apple HomeKit | Matter & Bridge Solutions

Honeywell is now Resideo, but don’t worry, your old smart devices aren't obsolete. Because I have found the four methods to add Honeywell HomeKit integration! And no, they aren't complicated at all. These easy methods show your Honeywell devices on your Apple Home App that require simple technical knowledge. So, let's begin!
Whether Honeywell works with Apple HomeKit depends on the model.
Bridge: Older RTH Wi-Fi thermostats, VisionPRO, Evohome and Honeywell cameras need a bridge such as AddtoHomeKit, ATH Bridge, Homebridge or HOOBS.
Native HomeKit: The T9, T10 Pro and T6 Pro pair directly with the Apple Home app.
Matter: The X2S, X7S and X8S join Apple Home through Matter.
Alarm panel: The Honeywell Lyric Controller pairs with HomeKit using its master code.
How to Add Older Honeywell Thermostats with a Bridge
Older RTH Wi-Fi thermostats on Total Connect Comfort, VisionPRO, Evohome and Honeywell cameras do not support HomeKit or Matter. A Homebridge-based bridge exposes them to the Apple Home app.
Option 01: AddtoHomeKit [Best Overall]
Honeywell AddtoHomeKit is a great solution to add your Honeywell devices to HomeKit. This solution allows you to just select what devices you want to add and then install the plugins for you. Which you can use to add your Honeywell Thermostat to Apple HomeKit. Not only Honeywell HomeKit Integration you can also add any devices to Apple Home Kit using AddtoHomeKit.
Why Did I Choose AddToHomeKit?
- Simple and requires low effort and time
- User-friendly
- Rrequired little bit of coding knowledge
- Premium service
- Has more than 2000 devices enabling them to plug in
- Offers seamless integration
Option 02: ATH Bridge [Affordable Solution]
AddToHomeKit Bridge is also a great way to create a Honeywell Apple Home. ATH Bridge is a device solution; it is pre-flashed and compiled server designed to seamlessly and effortlessly integrate Honeywell smart devices with Apple HomeKit. You just have to download the plugins and configure them.
Benefits of ATH Bridge
- A specially compiled and pre-flashed HomeBridge server.
- User-friendly
- No coding required
- Premium service
- Has more than 2000 devices enabling them to plug in
- Offers seamless integration
Option 03: HomeBridge Solution
HomeBridge is an amazing tool that bridges the gap for devices that are not natively supported by HomeKit. It is an open-source platform that lets you control Honeywell Home bridge plugins through the Apple Home app.
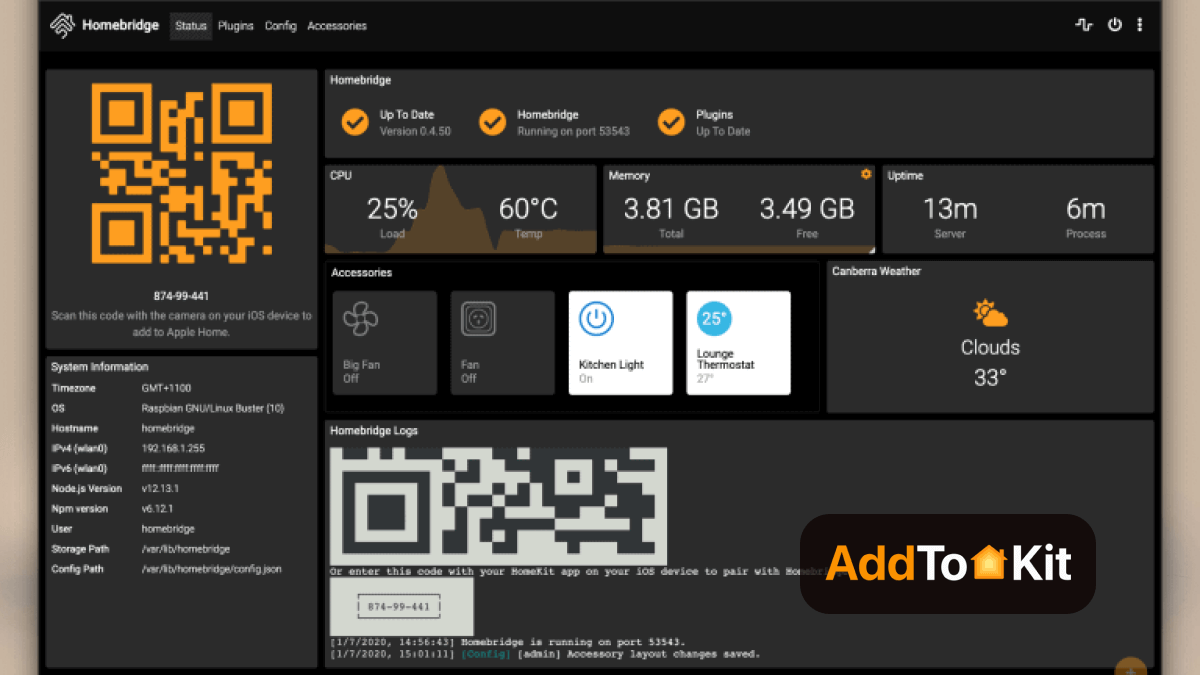
Step-By-Step Guide to add Honeywell Devices to HomeKit using AddToHomeKit
- Go to the AddToHomeKit website.
- Select the Honeywell ecosystem.
- Choose the preferred solution.
- Select the operating system.
- Install the HomeBridge plugins.
- Select the activation package.
- Follow on-screen instructions.
You can also integrate Wyze HomeKit and Vivint HomeKit.
Step-By-Step Guide to add Honeywell Devices to HomeKit using HOOBS
- Prepare your Network:
- Visit the HOOBS website:
- Boot up HOOBS:
- Access HOOBS Dashboard:
- Access HOOBS Configuration:
- Install Honeywell Plugin:
- Configure the Honeywell Plugin.
- Add Honeywell Devices to HomeKit.
Make sure you have a stable Wi-Fi network available, both your iOS device and HOOBs to the same wi-fi network.
You must flash the HOOBS image onto a microSD card using appropriate software (eg: BalenaEtcher or Raspberry Pi Image). Now, insert the microSD into the Raspberry Pi. Acquire and install HOOBS.
After the installation of HOOBS. Connect your Raspberry Pi to power and wait for HOOBS to boot up. HOOBS will appear as a Wi-Fi network namely “hoobs.local”, connect your device to this network.
Visit http://hoobs.local. And follow the on-screen instructions to complete the initial setup of HOOBS. You would most likely need to set up your admin account and connect HOOBS to your Wi-Fi network.
After completing the setup, you will be directed to the HOOBS dashboard where you can manage plugins and configure devices.
In the HOOBS dashboard, click on “Plugins” in the sidebar. Search for “Honeywell” in the Plugins Marketplace. Click “Install”.
You can also add Any LifeSmart Devices to Apple HomeKit using HOOBS solution.
Step-By-Step Guide to add Honeywell Devices to HomeKit using HomeBridge
- Install HomeBridge:
- Install HomeBridge Honeywell Plugin:
- Configure the Plugin:
- Restart HomeBridge:
- Pair with HomeKit:
Set up HomeBridge on a Raspberry Pi, macOS or Windows machine.
Add the HomeBridge-Honeywell-Protect or HomeBridge-Honeywell Access plugin to enable communication between HomeKit and Honeywell devices.
{
    "name": "Honeywell",
    "username": "your-honeywell-email",
    "password": "your-honeywell-password",
    "platform": "Honeywell"
}
Open the Home App on your device. You would be able to locate the Honeywell devices you have configured with the HomeBridge plugin. Now you will be able to add any Honeywell device to the Apple HomeKit setup and control them through the home app or via Siri.
Disclaimer: Third party integrations can be risky and dangerous.
Not only Honeywell Home Kit, but you can also add any devices to HomeKit using HomeBridge plugins.
Which Honeywell Models Work with Apple Home?
| Honeywell model | How it joins Apple Home | Home hub needed? | Works with HomeView? |
|---|---|---|---|
| T9 Smart Thermostat with Sensor | Native HomeKit | Only for remote control and automations | Yes |
| T10 / T10+ Pro Smart Thermostat | Native HomeKit | Only for remote control and automations | Yes |
| T6 Pro Smart Thermostat | Native HomeKit | Only for remote control and automations | Yes |
| Lyric Round (2nd gen), Lyric T5 | Native HomeKit (older models) | Only for remote control and automations | Yes |
| X2S, X7S, X8S Smart Thermostats | Matter | Yes, recommended | Yes |
| RTH Wi-Fi (Total Connect Comfort), VisionPRO, Evohome, cameras | Bridge: AddtoHomeKit, ATH Bridge, Homebridge or HOOBS | Yes, for remote control | Yes, once bridged |
Not sure which model you own? Check the label on the back of the thermostat faceplate, or open the Honeywell Home / First Alert app and look under device settings.
How to Add a Native HomeKit Honeywell Thermostat (T9, T10 Pro, T6 Pro)
These models have HomeKit built in. You do not need a bridge or an extra app.
- Find the HomeKit code
- Open the Home app
- Scan the code
- Assign a room and name
- Finish setup
On the thermostat, open Menu and select Connect HomeKit (wording varies by model). The setup code also appears on the device label and in the manual.
On your iPhone or iPad, open the Home app and tap + → Add Accessory.
Scan the QR code on the thermostat screen or label.
Choose a room and give the thermostat a simple name such as "Hallway Thermostat" so Siri commands are easy.
Tap Continue, then Done. You can now control it with the Home app and Siri.
How to Add Honeywell Matter Thermostats (X2S, X7S, X8S)
The Honeywell Home X-series thermostats are Matter certified, so you pair them with a Matter QR code instead of a HomeKit code. Apple recommends setting up a home hub before adding Matter accessories.
- Set up a home hub
- Show the Matter code
- Add the accessory
- Name and assign a room
Use an Apple TV 4K, HomePod (2nd gen), HomePod mini or Apple HomeView signed in to the same Apple Account.
Find the Matter QR code on the thermostat's settings screen or on the device label.
In the Home app, tap + → Add Accessory and scan the Matter code.
Pick a room and a clear name, then tap Done.
Coming in Q1 2027: Resideo has announced a software update for the ElitePRO, X7S and X8S that adds Apple's Adaptive Temperature Control and Clean Energy Guidance.
How to Add a Honeywell Lyric Alarm Panel to HomeKit
The Honeywell Lyric Controller security panel supports HomeKit natively. Instead of a printed code, it shows its setup code on screen after you enter the master code (Alarm Grid).
- Update the panel
- Start pairing in the Home app
- Enter your master code on the panel
- Enter the code on your iPhone
Make sure the Lyric Controller is on the latest firmware.
Tap + → Add Accessory, then More options (or "Don't have a code or can't scan?"). Select the panel, which appears with a name starting with "LyricAIO".
When the Lyric screen asks, enter your Master Code (not the installer code). An 8-digit HomeKit code then appears on the panel.
Scan or type the 8-digit code. The panel beeps when pairing completes.
If pairing fails: On the panel, go to Security → Tools → Master Code → Advanced → Reset HomeKit, then try again.
Note: As of April 15, 2026, Lyric panels can no longer be activated or remotely programmed through AlarmNet360. Existing HomeKit pairings keep working locally, but check with your alarm dealer before buying a used Lyric panel.
How to Use Honeywell with Apple HomeView
Apple HomeView is Apple's smart home display, available from November 13, 2026. It acts as a home hub, so every Honeywell thermostat in Apple Home appears on it. That includes native, Matter and bridged models.
What HomeView adds for Honeywell owners:
- Home hub built in: It enables remote control, automations and Matter pairing without a separate Apple TV or HomePod.
- Wall-mounted thermostat dashboard: The Home Modular face shows your thermostat alongside lights, locks and scenes. The wall-mounted version suits hallways and entrances.
- Thread support: It works with HomeKit and Matter Thread accessories, such as room sensors from other brands. Honeywell X-series thermostats connect over Wi-Fi, so Thread is not required for them.
- Siri on the display: You can say "Set the hallway thermostat to 21 degrees" from across the room.
Requirements: You need an iPhone with iOS 27.2 or later, or an iPad with iPadOS 27.2 or later.
- Set up HomeView
- Add your Honeywell thermostat
- Pin it to the Home Modular face
Follow the on-screen setup and add HomeView to the same home in the Home app.
Use the native, Matter or bridge method above. Accessories already in Apple Home appear on HomeView automatically.
Mark the thermostat as a favorite in the Home app so it shows on HomeView's Home face.
Honeywell or an Apple Home Collection thermostat? Apple's new Home Collection includes LG and Schneider smart thermostats ($199.95 each, rolling out from December 2026).
- Keep your Honeywell if it is a T9, T10 Pro or X-series. It already works with HomeView, and the X7S and X8S get Apple's Adaptive Temperature in Q1 2027.
- Consider replacing only very old non-smart models that can't join Apple Home even with a bridge.
Troubleshooting of Honeywell Thermostat
- Check the Model Number of the Thermostat to ensure it is HomeKit supported.
- Take a look at the wiring -if it is in good condition (A C-Wire is a must).
- Ensure a stable connection to WIFI.
Honeywell Home T9 at a Glance
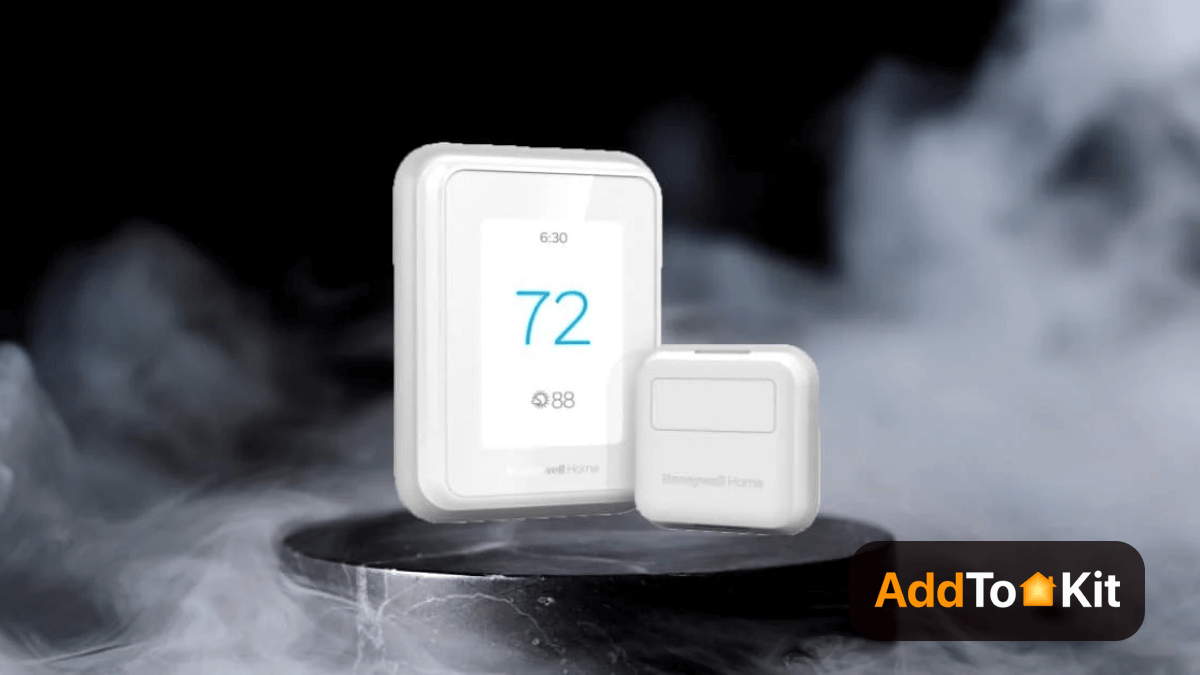
The Honeywell Home T9 is Resideo’s first consumer thermostat to support remote temperature sensors. The Honeywell T9 Apple HomeKit Smart Thermostat doesn’t have an integrated smart speaker. It won’t automatically adapt to your comings and goings. Users can control their Honeywell Home T9 smart thermostat using Siri or with the Apple Home app.
Included in the box
- Honeywell T9 thermostat unit
- Honeywell-branded power adapter kit
- Honeywell room temperature sensor + two batteries for it
- Backplate (mount this on the wall and hook the wires up to it)
- Mounting hardware for the backplate
- Instruction manual
Pros and Cons
Pros
- Responsive sensors
- Easy to set up
- Works with Amazon Alexa, Google Assistant, and HomeKit
- Extensive HVAC system compatibility
- C-wire kit included
- Priced significantly less than many competitors' models
- Clean and simple design
- Sensors can monitor humidity
- Responsive touchscreen display
Cons
- App could be more intuitive
- No control over humidity
- No energy reporting
Troubleshooting Issues for Honeywell Devices with Apple HomeKit
- Device Not Responding - Check Wi-Fi, restart device/hub, re-add to HomeKit.
- Device Not Appearing -Verify compatibility, rescan HomeKit code, update firmware.
- Intermittent Connectivity - Improve Wi-Fi signal, reduce interference, move device closer to hub.
- Accessory Not Found - Reset device, ensure hub is online.
- Siri Not Working - Check Siri settings, rename device in HomeKit.
- Automations Not Working - Recreate automation, ensure hub is online.
- Firmware Update Issues - Check Wi-Fi connection, update via Honeywell app.
- Hub Not Recognizing Device - Update hub software, ensure compatibility.
- Device Offline in HomeKit - Restart hub/device, re-add to HomeKit.
- HomeKit Secure Video Issues - Verify device support, check iCloud storage.
- Remote Commands Not Working - Ensure hub has internet, enable remote access.
- HomeKit Code Not Working - Re-enter code, contact support if damaged.
- Home App Crashing - Update iOS, reset HomeKit configuration.
Comparison Between AddtoHomeKit, ATH Bridge and HomeBridge
| Feature/Aspect | AddtoHomeKit | ATH Bridge | HomeBridge |
|---|---|---|---|
| Type | Web/Software Solution | Hardware Device | Node.js Server (Software) |
| Purpose | Adds devices to Apple HomeKit via plugins and step-guides | Adds non-HomeKit devices to Apple HomeKit | Bridges non-HomeKit devices to HomeKit |
| Ease of Use | Easy and clear instructions, Requires some technical expertise | Plug-and-play, Requires some technical expertise | Requires some technical expertise |
| Customization | Thousands of plugins and step-guides | Pre-installed plugins | Highly customizable with plugins |
| Compatibility | Supports almost all brands | Compatible with a wide range of devices | Supports a wide range of devices |
| Cost | Likely subscription-based or one-time fee | Cost-effective hardware solution | Free (open-source), but requires setup |
| Technical Expertise | Likely requires internet connection (web-based) | Local network control; works without internet | |
| Customization | Minimal | Moderate to high (depends on setup) | Moderate to high (depends on setup) |
| Portability | Web-based, accessible from any device | Compact and portable | Requires a server (Raspberry Pi, PC, etc.) |
| Ideal For | Users looking for a guided, plugin-based solution | Users seeking a plug-and-play hardware solution | Tech-savvy users who want full control |
Honeywell VisionPRO Advanced Thermostat Control
If you are looking to upgrade from the basic temperature control, you need to get to know about the Honeywell VisionPRO. It sets up their quality standard with its large touchscreen display and professional-grade performance. It supports complex HVAC setups such as multi-stage heating and cooling, and heat pumps. Features like programmable schedules and smart recovery help maintain consistent comfort while improving energy efficiency.
Key Features:
- Large, easy-to-read touchscreen interface.
- Supports multi-stage HVAC and heat pump systems.
- 7-day programmable scheduling for energy savings.
- Smart recovery adapts to your heating and cooling patterns.
- Wi-Fi models offer remote access and app control.
- Compatible with humidifiers, dehumidifiers, and ventilation systems.
What is Resideo App?
The Resideo app is the same as the Honeywell Home app that you are already familiar with. It is the main platform for managing compatible Honeywell smart home devices, including Wi-Fi thermostats like VisionPRO, cameras, sensors, and leak detectors. Additionally, the newer X-series thermostats run on the First Alert by Resideo app, while Resideo also supports connected homes through the Resideo Connect app.
Features of Resideo App
- Remote HVAC Control.
- Wide smart device Integration.
- Smart Home Compatibility.
- Energy & Runtime Insights.
- Alerts & Notifications.
- Regular Updates.
Which Method Should You Choose?
- T9, T10 Pro, T6 Pro: Use native HomeKit. It's free and takes five minutes.
- X2S, X7S, X8S: Use Matter, with a home hub.
- Lyric Controller alarm panel: Use native HomeKit with your master code.
- Older Wi-Fi models, VisionPRO, Evohome, cameras: Use AddtoHomeKit, our recommended guided setup, or ATH Bridge if you want a dedicated plug-in device.
- Buying an Apple HomeView: Any of the above will show up on it automatically.
FAQs about Honeywell HomeKit Integration
Some models do. The T9, T10 Pro and T6 Pro pair natively, and the X2S, X7S and X8S work with Apple Home through Matter. Older Wi-Fi thermostats, Evohome and most Honeywell cameras have no native support, so you need a Homebridge-based bridge such as HOOBS or ATH Bridge.
The Honeywell thermostat's average lifespan is around 10-20 years.
Evohome is not integrated with Apple HomeKit.
Yes, the T6 Resideo Honeywell Home Thermostats are compatible with Google Assistant.
You'll use the Total Connect Comfort app usually for remote management, but some newer models, especially Lyric, use the Resideo App.
Open the Home app, tap the plus button, choose Add Accessory and scan the Matter QR code shown on the thermostat or in its settings menu. Models like the X2S, X7S and X8S pair this way without a HomeKit code. You will need a HomePod or Apple TV set up as your home hub first.
Install homebridge-resideo from the Homebridge UI plugins tab. Create a free Honeywell Home developer account, add its consumer key and secret to the plugin, then click Link Account and sign in to Resideo. Pick your thermostats, save and restart Homebridge. ATH Bridge and HOOBS follow the same plugin steps.
Yes, in most cases. The T9, T10 Pro and X8S need a C-wire for steady power, and without one the thermostat can drop off Wi-Fi and show No Response in the Home app. No C-wire at the wall? Check the box for an included power adapter kit before running new wire.
Native HomeKit models like the T9 work on your home Wi-Fi without one. But Matter thermostats, remote control away from home and automations all need a home hub, which is a HomePod, HomePod mini or Apple TV. The same goes for Honeywell models added through Homebridge or ATH Bridge.