How to Add Any Govee Devices to Apple HomeKit

If you’re a proud owner of Apple HomeKit and Govee Smart Home Devices, you probably want to control your Govee with Apple Home App and Siri. But how? Don’t worry! I have top solutions to integrate your Govee to HomeKit.
Govee does not officially support Apple HomeKit. To add Govee devices, you have four proven methods: AddToHomeKit (easiest, software-based), ATH Bridge (plug-and-play hardware), or Homebridge/HOOBS (free, open-source). For select newer Govee devices like the LED Strip Light M1 and Smart Plug Pro, native Matter integration is also available.
Software Solutions
Hardware Solutions
Govee + HomeKit Methods Compared
| Method | Hardware Required | Best For | Works With |
|---|---|---|---|
| Native HomeKit (Matter) | None (device only) | New Govee Matter devices. Simplest option. | Govee M1, Floor Lamp 3, Smart Plug Pro, Ceiling Lights, BR30 Bulbs |
| AddToHomeKit Bridge | AddToHomeKit bridge (one-time purchase) | Older Govee devices. Works with everything. | Any Govee device (old or new, Matter or not) |
| ATH Bridge | ATH Bridge hardware (one-time purchase) | Alternative to AddToHomeKit (same functionality) | Any Govee device |
| Homebridge | Raspberry Pi + Govee plugin (free) | Tech enthusiasts. Maximum customization, free software. | Any Govee device (Raspberry Pi + Govee plugin) |
| Home Assistant | Raspberry Pi or NAS (free software) | Power users. Manages all smart home devices. | Any Govee device (Raspberry Pi or NAS + integration) |
AddToHomeKit [Recommended Solution]
Govee AddtoHomeKit has become my preferred method for seamlessly integrating my Govee Apple HomeKit. It's a software solution that simplifies the process significantly. It's almost unbelievably easy to use, requiring minimal time. I recommend it for anyone with a little technical knowledge to try it out.
Why did I Choose AddToHomeKit?
- Very simple and requires low effort and time
- User-friendly
- Premium service
- Has more than 2000 devices enabling them to plug in
- Offers seamless integration
Steps to Add Govee and HomeKit using AddToHomeKit
- Go to the AddtoHomeKit official website.
- Select the Govee ecosystem.
- Once you are directed to the next page, select your preferred solution.
- Now select the operating system.
- Install the Govee HomeBridge Plugin.
- Tap on Add to HomeKit.
- Click on the Activation package to activate your account.
- Follow the instructions displayed on screen.
You can also integrate Alexa HomeKit and even TP-Link Kasa HomeKit or other incompatible devices using AddtoHomeKit.
ATH Bridge
AddToHomeKit Bridge is also a great way to create a Govee Apple Home. To give a brief explanation, ATH Bridge is a device solution, it is pre-flashed and compiled server designed to seamlessly and effortlessly create Govee HomeKit, any smart devices to Apple HomeKit. For that, I need to download the Homebridge plugin and configure it to the ATH Bridge. Then I can control my Home Kit Govee through the ATH Bridge.
ATH Bridge
I would recommend this as the best hardware option for anyone looking for a reliable plug-and-play solution, as it makes the integration process seamless and hassle-free.
HomeBridge Solution
Another option is HomeBridge. HomeBridge is the best solution for integrating non-HomeKit-enabled smart home devices with Apple’s HomeKit ecosystem. It is a server built on Node.js. Also, it allows you to connect Govee HomeBridge seamlessly.
It does not require any installation costs on your chosen hardware. This software expands the accessibility of your HomeKit-enabled abode to include natively incompatible devices and services, such as Govee.
As a result, Apple Home Kit Govee homebridge becomes simple through using this solution. Below, we'll explore the process of Apple Home Govee via the Homebridge platform.
You can also add Ring Camera to HomeKit using the HomeBridge solution.
Native HomeKit: Govee Matter Devices (No Bridge Needed)
If you have a Govee device with "Matter" or "Works with Apple HomeKit" printed on the box, you can add it directly to HomeKit in 5 minutes—no bridge, no software, no subscription.
Which Govee Devices Support Native HomeKit (2026)?
Govee has rapidly expanded their Matter lineup since launching the M1 LED Strip in 2023. Here's the complete list:
| Govee Product | Matter Support | HomeKit Native | Device Type |
|---|---|---|---|
| LED Strip Light M1 (2m) | Yes (Matter over Wi-Fi) | Yes | RGB LED Strip |
| LED Strip Light M1 (5m) | Yes (requires Matter control box) | Yes | RGB LED Strip |
| Smart Plug Pro | Yes (Matter over Wi-Fi) | Yes | Smart Plug |
| Floor Lamp 3 | Yes (Matter over Wi-Fi) | Yes | Floor Lamp |
| Floor Lamp 3 Lite | Yes (Matter over Wi-Fi) | Yes | Floor Lamp |
| Lantern Floor Lamp | Yes (Matter over Wi-Fi) | Yes | Floor Lamp |
| Ceiling Light Ultra (21") | Yes (Matter over Wi-Fi, announced CES 2026) | Yes | Ceiling Light |
| Sky Ceiling Light | Yes (Matter over Wi-Fi, announced CES 2026) | Yes | Ceiling Light |
| BR30 Smart Bulbs (Matter version) | Yes (Matter over Wi-Fi) | Yes | Recessed Bulbs (4-pack) |
| Outdoor Spotlights Lite | Yes (Matter over Wi-Fi) | Yes | Outdoor Lights |
| Outdoor Strip Lights 2 | Yes (Matter over Wi-Fi) | Yes | Outdoor Strip |
| Star Light Projector | Yes (Matter over Wi-Fi, certified July 2024) | Yes | Ambient Projector |
⚠️ Important Note: Check the box before buying. Govee still sells older non-Matter versions of some products (like the original M1 or older Floor Lamp). The non-Matter versions require a bridge (AddToHomeKit, Homebridge, etc.). Only buy products with "Matter" or "Works with Apple HomeKit" printed on the packaging.
Setup: Add Govee Matter Device to HomeKit (5 Minutes)
- Unbox and power on
- Open Apple Home app
- Tap + (top left) and select "Add Accessory"
- Scan HomeKit code
- Select room and name the device
- Done
Plug Govee device into power and Wi-Fi (2.4GHz or 5GHz). Wait 1-2 minutes for initialization.
On your iPhone, iPad, or Mac, open the Home app.
You'll see the option to add a new device to HomeKit.
Point camera at HomeKit code (usually on device or packaging). Or enter 8-digit code manually.
Choose where the device is located (bedroom, living room, etc.) and give it a name like "Bedroom LED Strip".
Device appears in Home app instantly. Control via Siri: "Hey Siri, turn on the bedroom lights."
Total time: 5 minutes. No Govee app required (but you can use it for advanced features).
Supported HomeKit Features (Govee Matter Devices)
All Govee Matter devices expose these controls to HomeKit:
- On/Off toggle (via Siri or Home app)
- Brightness adjustment (1-100%)
- Color temperature (warm to cool white)
- Color changing (RGB colors, if supported)
- Automations (turn on at sunset, turn off when you leave)
- Scenes (create "Movie Mode," "Bedtime," etc.)
- Remote control (if you have a HomeKit hub: Apple TV 4K, HomePod, or iPad)
- Siri voice control
Note: Some advanced Govee app features (like voice sync, scene scheduling in Govee app) may not be available in HomeKit. If you need those, use the Govee app alongside HomeKit.
Pros & Cons: Native HomeKit
Pros
- Simplest setup (5 minutes, no bridge, no software)
- No additional hardware required (just buy the device)
- Future-proof (Matter is the industry standard)
- Works with HomeKit, Alexa, Google Home simultaneously
- No subscription fees
- Native HomeKit integration (fastest, most reliable)
- Works offline on your home network (no cloud required for local control)
Cons
- Only works with new Govee Matter devices (not older models)
- Limited feature set in HomeKit (advanced Govee features not available)
- No direct integration with Govee app automations (must create separate HomeKit scenes)
- All Govee Matter devices use Wi-Fi only (no Thread support, less reliable mesh than Thread)
- Requires HomeKit hub for remote access + automations (HomePod, Apple TV 4K, or iPad)
Who Should Use Native HomeKit?
- Users buying new Govee devices in 2026 (any of the Matter models above)
- People who want the simplest, fastest setup
- Those who don't have older Govee devices
- Anyone who owns an Apple TV 4K or HomePod mini (for remote access)
- Users who prioritize simplicity over advanced features
Note: If your Govee device does not support Matter, you will need a third-party bridge like Homebridge to connect it to Apple HomeKit.
Using Siri Shortcuts
If your Govee device doesn't support Matter or native HomeKit, you can still use Siri voice commands through the iOS Shortcuts app.
The key is a Govee feature called Tap-to-Run a custom macro that lets you bundle multiple light settings into a single command, which can then be triggered by Siri.
This means you can say "Hey Siri, Movie Mode" and your Govee lights will instantly respond and no HomeKit required.
How Tap-to-Run Works
A Tap-to-Run is a pre-set instruction you build inside the Govee app. Instead of manually adjusting your lights each time, you create a single button that tells your lights exactly what to do — for example, "Turn on, set to 50% brightness, and switch to the Ocean scene."
Step-by-Step Guide to Control Govee Devices with Siri Shortcuts
Step 1: Create the Action in Govee
- Open the Govee Home app and go to the Home or Smarts tab.
- Find the Tap-to-Run section and tap + to create a new action.
- Select your device and configure the settings — color, brightness, or a custom scene.
Step 2: Link it to Siri
- Once saved, tap the Add to Siri button next to your Tap-to-Run command.
- This will open the iOS Shortcuts setup.
Step 3: Assign a Phrase
- Type or record a custom phrase like "Movie Mode" or "Lights Out."
- Tap Done to save it to your iPhone's Shortcuts app.
Why Use This Siri Commands for Govee HomeKit Integration?
- Voice Control: Trigger any Govee scene with a Siri command, even on non-Matter devices.
- iOS Integration: Commands appear as widgets on your home screen or can be triggered via NFC tags.
- Complex Scenes: Unlock dynamic Govee-specific effects that Apple HomeKit cannot natively support.
Home Assistant (Advanced Method)
For advanced users who want local control and deeper automation, Home Assistant can bridge Govee devices into Apple HomeKit with more granular control than Homebridge. This method works for both Matter and non-Matter Govee devices.
Requirements
- A device running Home Assistant (Raspberry Pi, NAS, or dedicated server)
- Govee LAN API enabled on your Govee device (via Govee Home app → Settings → LAN Control)
- Apple HomeKit integration enabled in Home Assistant
Steps
- Open Home Assistant and go to Settings → Integrations.
- Search for and install the Govee LAN or Govee Cloud integration.
- Log in with your Govee account or enter your LAN API key to import your devices.
- Once your Govee devices appear in Home Assistant, go to Settings → Integrations → Apple HomeKit.
- Select which Govee devices to expose to HomeKit and save.
- Open the Apple Home app, tap + → Add Accessory, and scan the HomeKit bridge QR code from Home Assistant.
- Your Govee devices will now appear natively in Apple Home.
Why use this over Homebridge? Home Assistant gives you local control (no cloud dependency), supports more complex automations, and can manage your entire smart home — not just Govee. The trade-off is a steeper setup curve.
How to Integrate Govee Apple HomeKit Using HomeBridge Solution
- Install HomeBridge
- Plugins Install
- Configure Plugin
- After configuring the plugin, restart HomeBridge
- Pair with HomeKit
If you haven't already, you must set up HomeBridge on your chosen platform. (HomeBridge is normally installed on a device like a Raspberry Pi or a computer running Node.js).
First find a HomeBridge plugin that is compatible with Govee devices. It can be done from the npm registry or GitHub. HomeBridge Govee can mention one of the popular plugins.
After the plugin is installed, you need to configure it. Edit your HomeBridge config.json file. Add a new platform for the Govee plugin and include username and password as below: Install the plugin using npm: Make sure to replace "your_govee_email@example.com" and "your govee password" with your Govee login authorization.
Add the following config code to your configuration file:
{
  "name": "Govee",
  "username": "your-govee-email",
  "password": "your-govee-password",
  "platform": "Govee"
}Open the Home app. Then you can see the Govee devices that you've configured in the HomeBridge plugin. now you can add them to your HomeKit setup. Also, you can control them through the home app or Siri.
Please note that third-party solutions can be risky.
HOOBS
HOOBS (HomeBridge Out of the Box) is probably one of the most popular open-source methods. It is a hardware that is very user-friendly and compatible. It indicates the process of setting up and operating HomeBridge. I think it is a great method to add govee devices to HomeKit.
How to Add Govee HomeKit with HOOBS
- Install HOOBS on a Raspberry Pi or any other suitablr hardware.
- Go to the HOOBS dashboard.
- Visit the Home App.
- Select "Add Accessory".
- Next, select the HOOBS server.
- Scan the QR code displayed on-screen.
- Finally, follow the instructions on-screen.
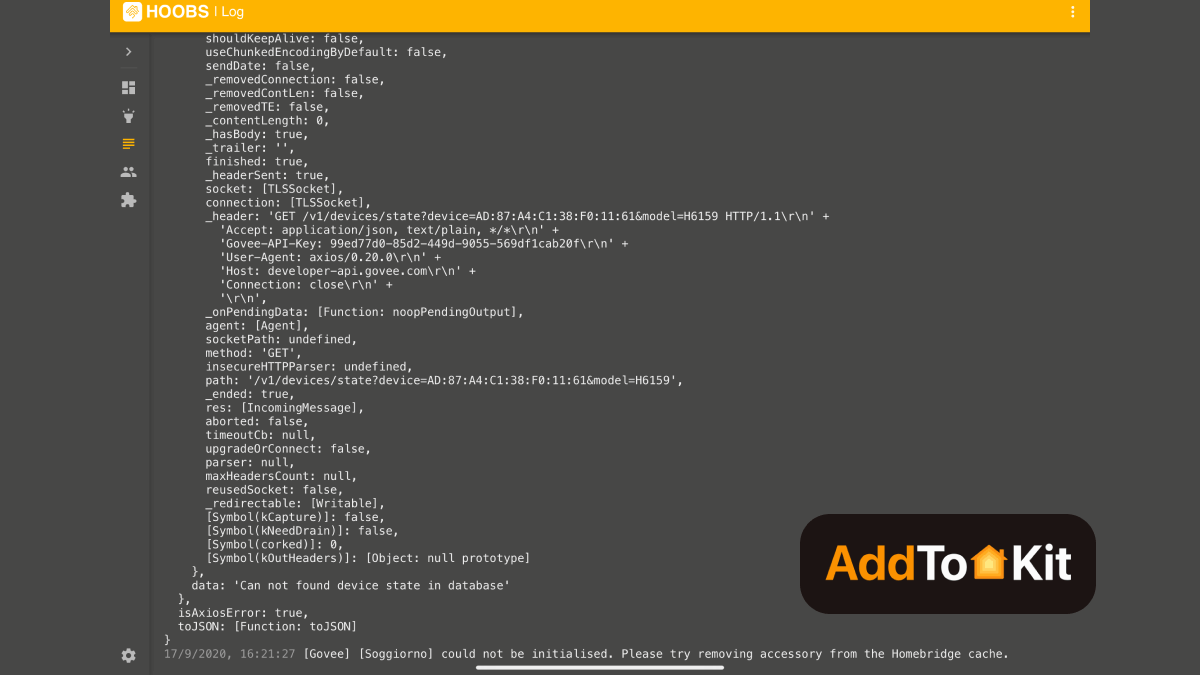
Now you can also integrate Hikvision HomeKit, Wyze HomeKit, Dahua HomeKit using HOOBS.
What You Can do with Govee Apple HomeKit Integration?
Control any Govee devices with the Apple Home App and Siri's voice command.
- Control Govee smart Lights with HomeKit
- Control Govee Led Strip Lights with HomeKit
- Control Govee Curtain Lights with HomeKit
- Control Govee Thermometer with HomeKit
- Control Govee Floor Lamp with HomeKit
When it comes to the Apple HomeKit Govee devices, you can rely on automation workarounds. The best method of getting the Govee to work with HomeKit is through AddtoHomeKit. So, you don’t need to worry about the integration.
The good news is that you can control your LED lights through the Apple HomeKit control with Matter.
Add Govee to the Home App
Once you create the account in the Govee app. Then, the upcoming steps will be easy to follow.
- First, enable the Bluetooth device on your Apple device.
- Click the +icon and tap on the add Accessory option.
- Scan the QR Code and tap on continue.
- Then, add your location, name, and about your device.
- Press on the Done button to complete the Integration process.
Govee Matter Integration: LED Strip Lights (2026)
Govee has significantly expanded its Matter lineup since the M1 launched in 2023. Multiple LED strip models now support Matter over Wi-Fi, connecting natively to Apple HomeKit, Google Home, Alexa, and SmartThings — no bridge required.
Important: All Govee Matter devices use Matter over Wi-Fi only. Thread is not currently supported on any Govee product. Older non-M1 strips cannot receive Matter via firmware — Govee has confirmed Matter requires upgraded hardware chips.
Govee LED Strip Models — Matter & HomeKit Status (2026)
| Model | Type | Matter | Native HomeKit | Length Options |
|---|---|---|---|---|
| LED Strip Light M1 | RGBIC+ | ✅ Yes (Wi-Fi) | ✅ Yes | 6.56ft, 16.4ft |
| RGBIC Strip Light 2 Pro | RGBWWIC | ✅ Yes (Wi-Fi) | ✅ Yes | 16.4ft, 32.8ft |
| COB LED Strip Light Pro | RGBICW | ✅ Yes (Wi-Fi) | ✅ Yes | 9.8ft, 16.4ft |
How to control HomeKit Compatible Govee Devices?
There are many ways to control the Govee HomeKit device using different types of devices.
- You can enable commands from your iPhone, Maz, Apple Watch, iPad, or Apple TV.
- Before using this homekit, you need to sign in with an iCloud account to control the device.
- You can access Homekit through the Home app.
Govee LED Strip Light M1
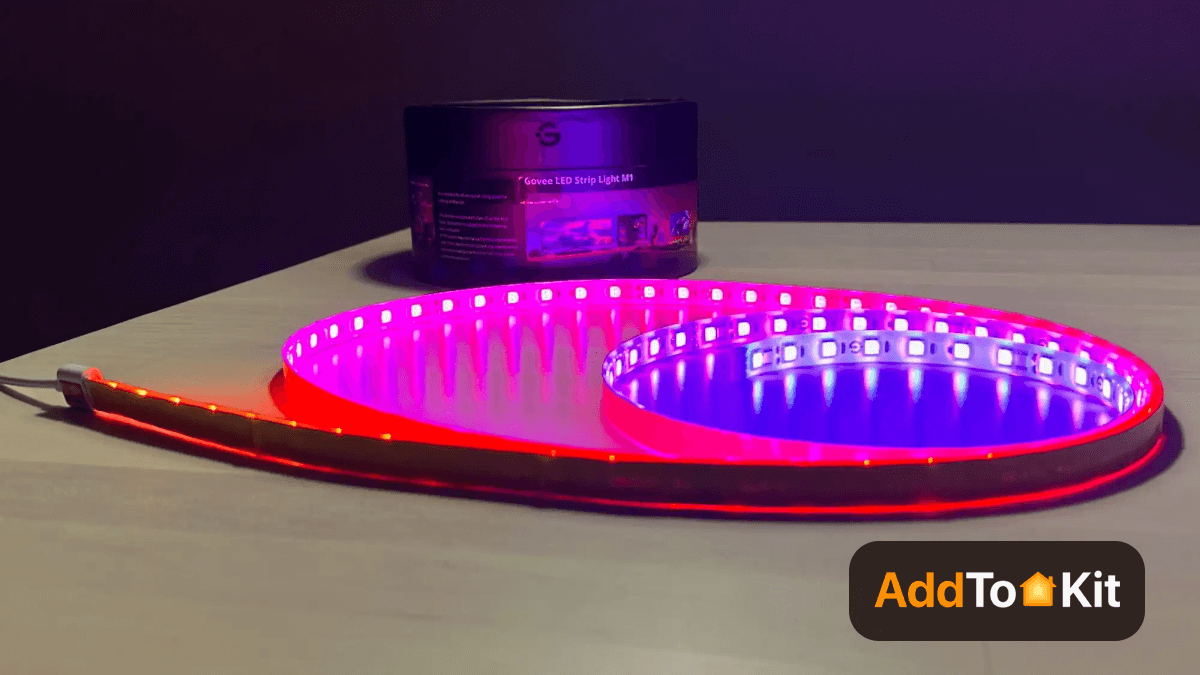
The Govee LED Strip Light M1 is perfect for adding vibrant lighting to your home or business. It offers a wide range of RGB colors and adjustable brightness, so you can create just the right atmosphere.
Key Features
- Upgraded RGBIC technology (4-in-1 Chipset and 60 LEDs/m)
- Music DreamView with Govee Lights
- Work with Apple Home, Alexa, Google Assistant and SmartThings
- Available in app control, voice control
Govee Smart Plug Pro
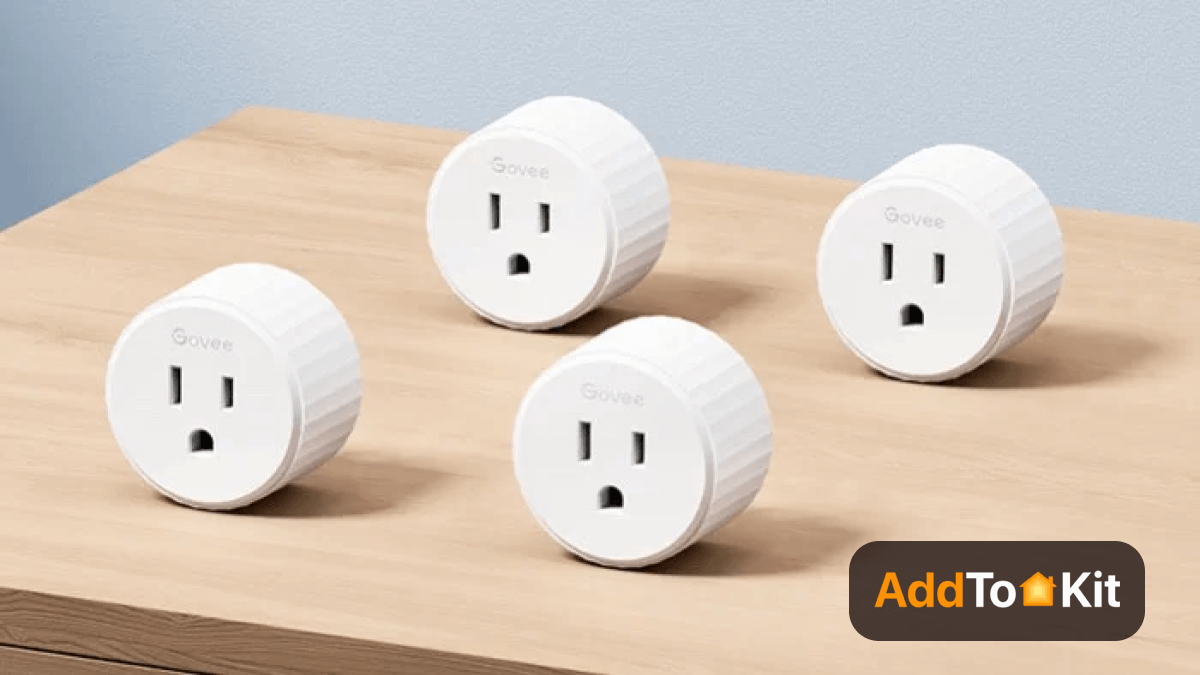
The Govee Smart Plug Pro is a convenient addition to any home. It allows you to control your electronic devices remotely using a smartphone app, making it easy to turn things on or off even when you're away.
Key Features
- Remote control
- Matter compatibility
- Voice control
- Work with Amazon Alexa and Google Assistant
Add Govee Lights to HomeKit Using Siri
After I added my Govee lights to HomeKit, I could manage them easily with Siri.
- Switch off the lights in “Your Room”.
- Set the light color to “Color” in “Your Room”.
- Activate RGB mode on the lights in “Your Room.”
- Turn on the lights in “Your Room”.
Troubleshooting Common Issues
- Ensure Govee Device is Set Up in the Govee Home App
- Before integrating your Govee device with HomeKit, make sure it’s properly set up and functioning in the Govee Home app.
- Verify that the device is online and working in the Govee Home app before attempting to add it to HomeKit.
- Confirm HomeKit Compatibility
- Not all Govee devices are HomeKit compatible. Make sure your model supports HomeKit integration.
- HomeKit support should be indicated in the device description or packaging, or you can check the product details in the Govee Home app.
- Verify HomeKit Setup Code
- To add a Govee device to HomeKit, you need the HomeKit setup code (either a QR code or an 8-digit code).
- You can find this setup code in the Govee Home app under device settings or on the device packaging. Make sure you have the correct code before trying to pair it.
- Check Wi-Fi Network Connection
- Ensure both your Govee device and your iPhone/iPad are connected to the same Wi-Fi network. This is important for HomeKit to work properly.
- If your network has separate 2.4 GHz and 5 GHz bands, try connecting your Govee device to the 2.4 GHz band, as many IoT devices do not support 5 GHz Wi-Fi.
- Restart Govee Device
- If the device is not showing up in HomeKit or is behaving unexpectedly, try restarting your Govee device.
- In the Govee Home app, you can disable and re-enable the device or perform a hard reset if necessary (refer to your specific Govee device’s manual for reset instructions).
- Ensure the Govee App is Updated
- Make sure you are using the latest version of the Govee Home app. Go to the App Store and check for any updates for the Govee Home app.
- Keeping your Govee app updated ensures compatibility with HomeKit and resolves potential bugs.
- Re-add Govee Device to HomeKit
- If the Govee device was previously added to HomeKit but is no longer working, you may need to remove it and add it back.
- Open the Home app on your iPhone or iPad.
- Find the device and remove it by pressing and holding the device, then selecting Remove Accessory.
- Scan the HomeKit QR code again from the Govee Home app or enter the 8-digit code to re-pair it.
- Ensure HomeHub Connectivity
- If you're controlling devices remotely (outside your home), ensure that your HomeKit hub (Apple TV, HomePod, or iPad) is working correctly.
- Your HomeKit hub should be connected to the same Wi-Fi network as the Govee device and remain powered on and updated.
- Update Govee Device Firmware
- Firmware updates are crucial for the Govee device to function correctly, especially when using HomeKit. In the Govee Home app, go to the Device Settings and check for any available firmware updates.
- Make sure that both the device and the Govee app are up-to-date.
- Check Router Settings
- Ensure that your router is not blocking communication between your Govee device and your iPhone.
- If you have custom firewall or security settings on your router, they may interfere with HomeKit. Temporarily disable any firewalls or VPNs to see if it resolves the issue.
- Reboot Your Router
- Sometimes, network communication issues can be fixed by simply restarting your router. This can help if your Govee device is not showing up in HomeKit.
- Check for Network Interference
- If you're using a VPN on your device, it may block local network communication, causing issues with HomeKit. Disable the VPN temporarily and check if this resolves the issue.
- Similarly, ensure your router firewall settings are not blocking HomeKit-related traffic.
- Reboot Your iPhone or iPad
- A simple restart of your iPhone or iPad can sometimes resolve HomeKit connectivity issues, especially if the Home app or your device’s HomeKit configuration is acting up.
Editor's Pick
When comparing these four methods, my personal pick goes to AddtoHomeKit. Because it is a software solution, easy, fast, and just likeable overall. It is a lifetime service with a one-time subscription. These solutions have to be added as mediators between the Govee Smart Lights and the HomeKit accessibility. That way, it’ll be much easier to connect Govee to Apple Home. But you must think about what best fits you and your unique demands. I hope this information was helpful to you in determining what the choice was.
FAQs
Govee offers superior-quality smart home products, including smart light bulbs, LED strip lights, home security devices, and indoor thermometers, helping you live a safer, more colorful, and convenient life.
With the Govee Music Sync Box, make your music shine. The sync box can control Govee smart lights in the same space for seamless music synchronization, creating a gorgeous sound and light arrangement made for you.
Yes, after a few easy setup steps, you can control your device with Alexa.
If you have a Govee smart light and a HomePod from Apple, they can communicate using the Matter protocol to control your Govee product in your home when you give a voice command.
It depends on the device. Newer Matter-enabled Govee products — such as the M1 LED Strip, Floor Lamp 3, and Smart Plug Pro — connect directly to Apple Home with no bridge. Older Govee devices aren't Matter-compatible, but you can still add them to HomeKit using a solution like AddToHomeKit or ATH Bridge.
Govee officially don’t support the Apple ecosystem. But you can use third-party solutions to control Govee products with Siri and Apple Home.
Yes. Govee's Matter-enabled devices can be added to Samsung SmartThings, since SmartThings supports the Matter standard. Older, non-Matter Govee devices aren't natively supported and would need a third-party bridge.